Wednesday, January 22, 2014

Ella's cushion -- Dresden plate pattern done in wool.

This is Ella's cushion.  Ella is my 22-month-old Field Spaniel that thinks she's a lap dog.  She certainly believes she fits perfectly on this cushion and that well, frankly, she owns it.  Adults can perch their feet on a small corner but should, by no means, feel the cushion is theirs.

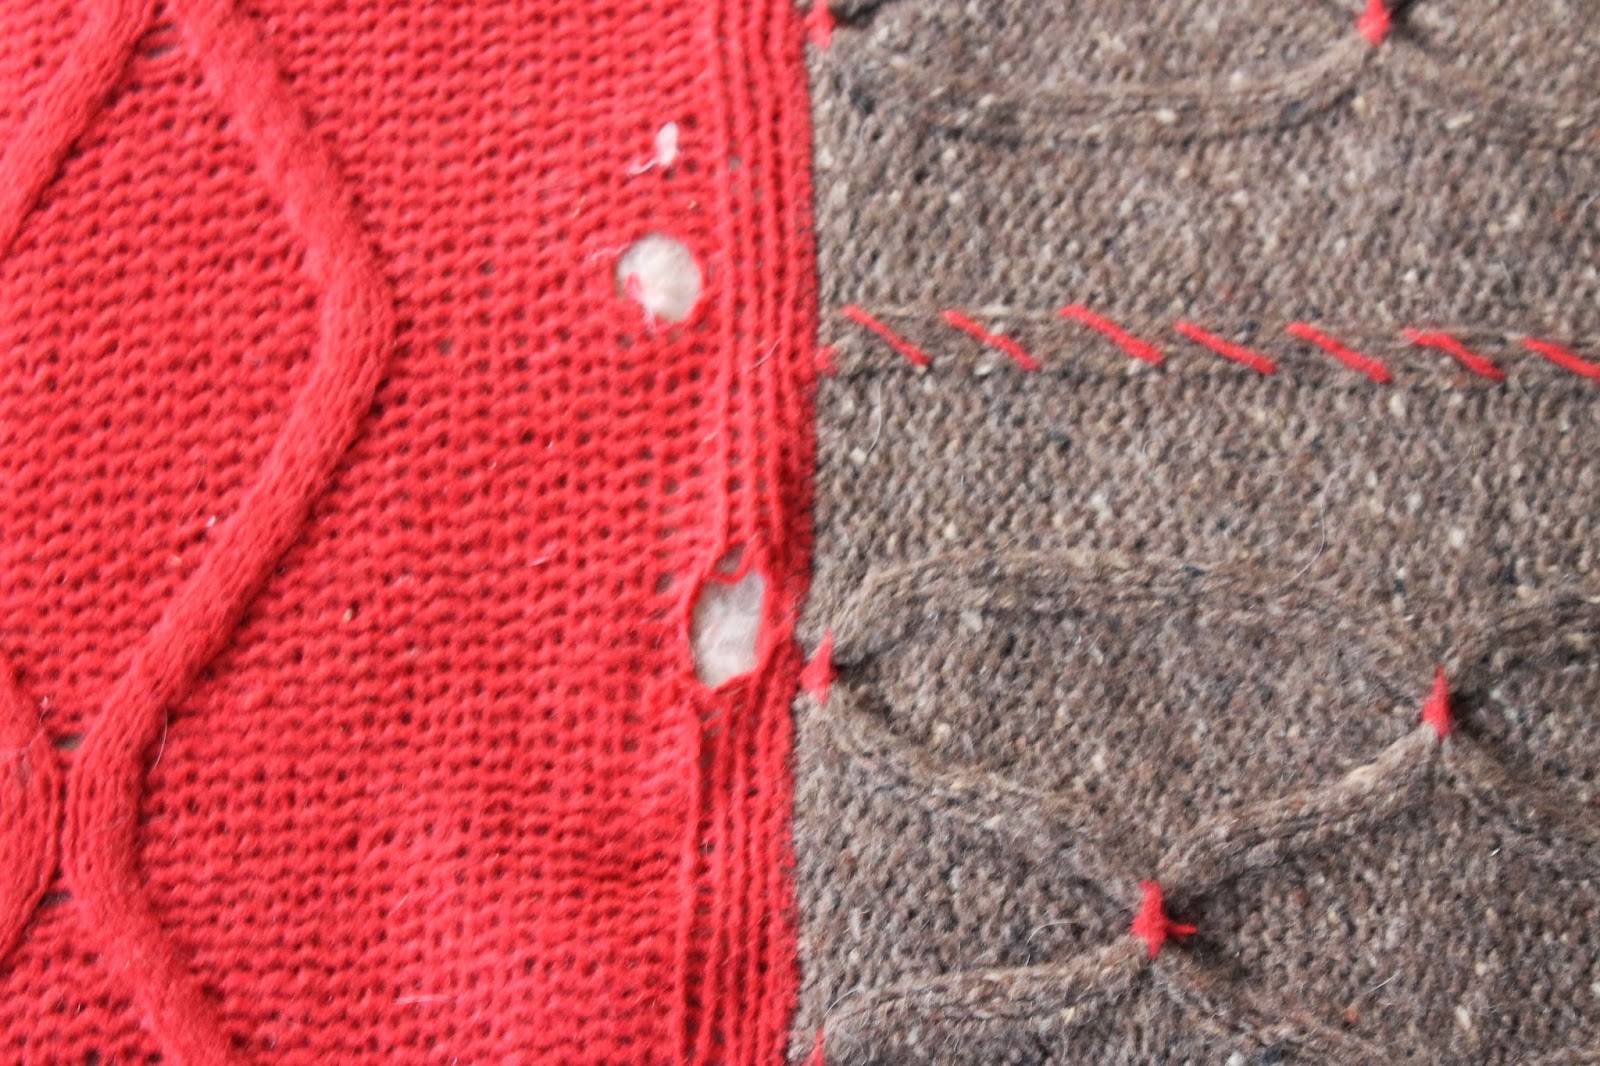
The cushion cover was made by me using various leftover wools.  The red panel is a wool and possum blend that didn't felt as tightly as I wanted and, as you can see, was weak, leading to a hole.  The center section is a sturdy wool tweed, knit in a wide rib and then smocked using the red yarn to tie the panels together.  The variegated panel was a yarn I hand-dyed myself that just happened to match the other two.  I knit and felted the three panels, sewed them together, and made a cushion for this lazy Susan ottoman we have.


Obviously, once the holes appeared, I started thinking of how to replace the cushion and what I wanted.  The original cushion was thicker and was a boring tapestry thing that came with the ottoman.  I didn't even wait for that to wear out before making the paneled cushion.

The new cushion would use a Dresden Plate quilting pattern.  I've posted about my love of American quilts before.  I never get tired of the play of pattern.  Naturally, I gravitated for the color wheel classic of red/blue/yellow.  I even found a 12-panel Dresden Plate pattern to use, planning for 4 repeats of the colors.  But, that green kept sneaking in to the pile.  The couch opposite this ottoman is dark green leather.  So, green always feels right.

 Here's the layout of the panels.  I had 2 fabrics in each color.  Every panel has texture of some kind -- plaid or stripe or whatever.  Most are hand-dyed by me or someone like me.

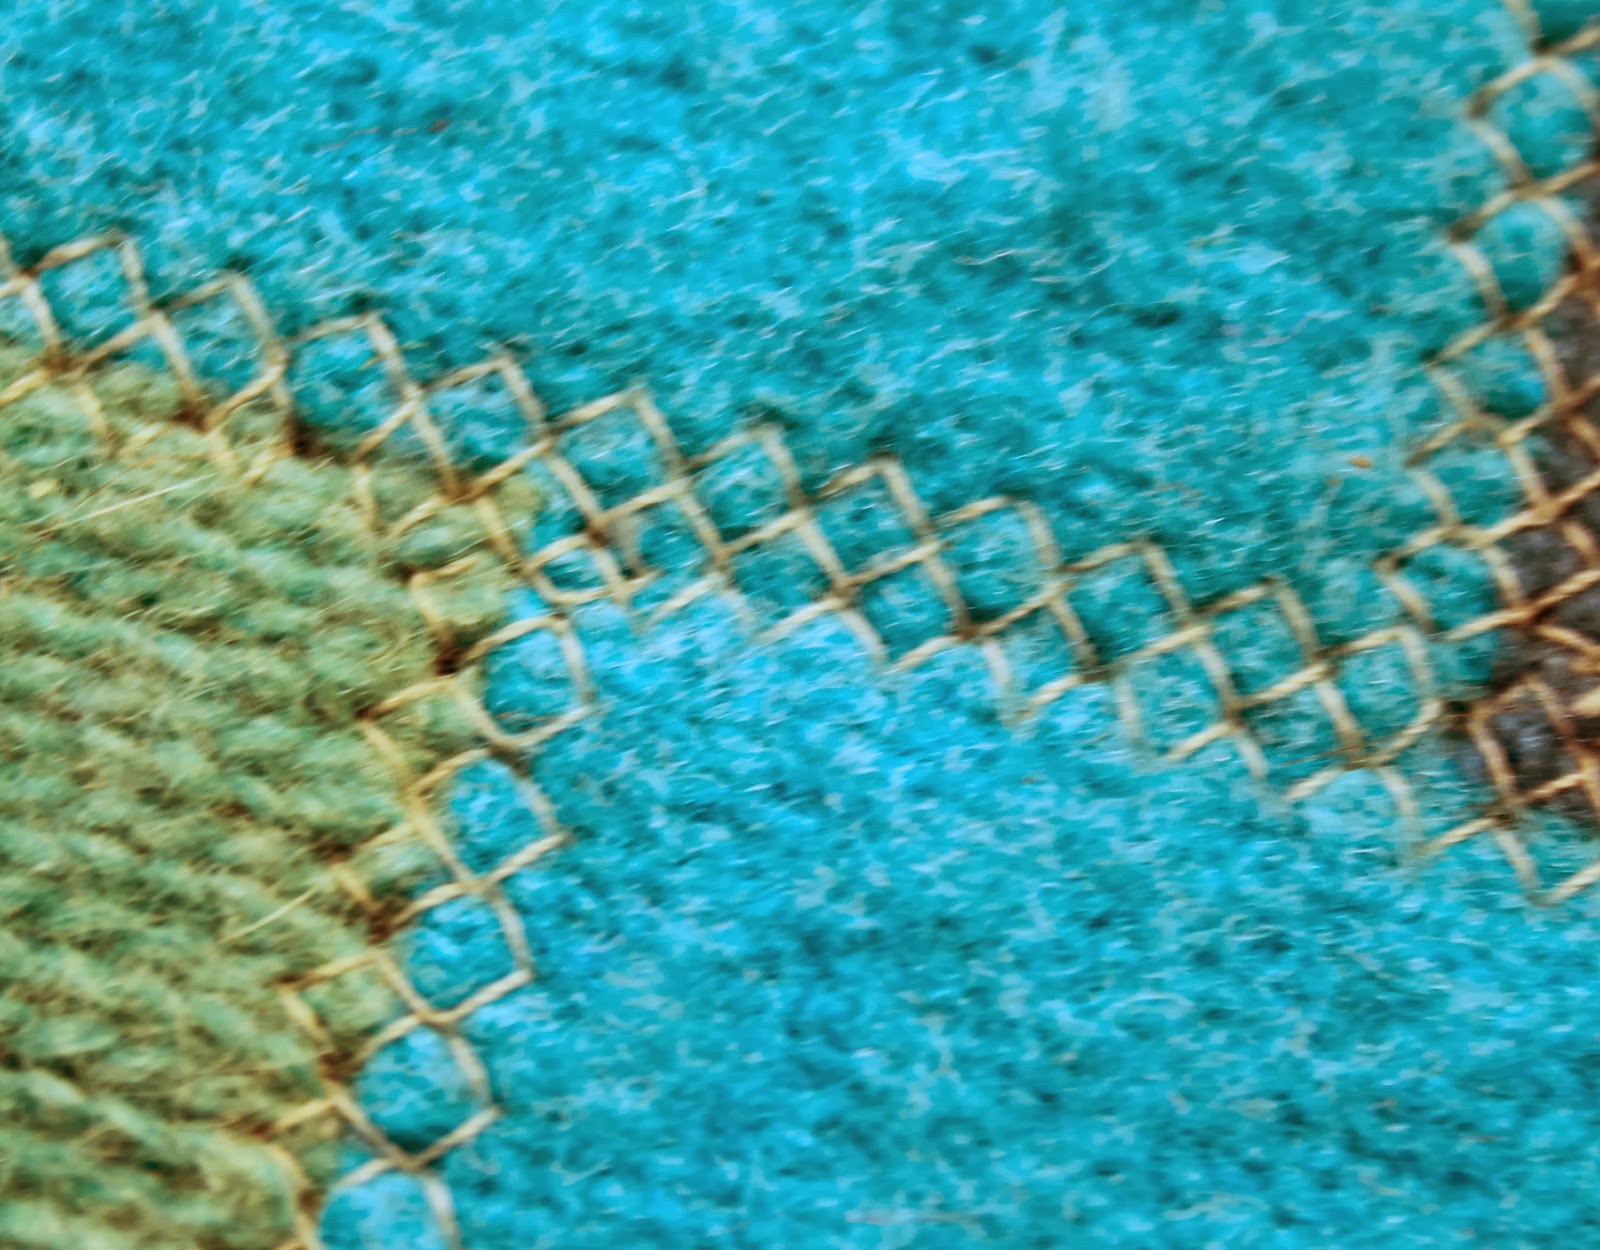
Now to the stitching.  Given that Ella was going to lay on this thing, it needed to be strong.  So, I machine-stitched the panels together along their long sides.  Then I blanket stitched the entire motif to the background wool.  This was tricky because it is big.  The motif measures 20 inches across.
After doing the outside, I very carefully pinned and started going over each long side with another type of blanket stitch.  This stitching was reinforcement and I did it to make sure everything stayed put with a 35-pound dog jumping up onto it.

Finally, I made a penny rug center to cover the big hole.  That was the hardest part to sew on because the rough cut hole kept shifting.  I probably should have basted everything on first but it was too late for that.  I just made do.

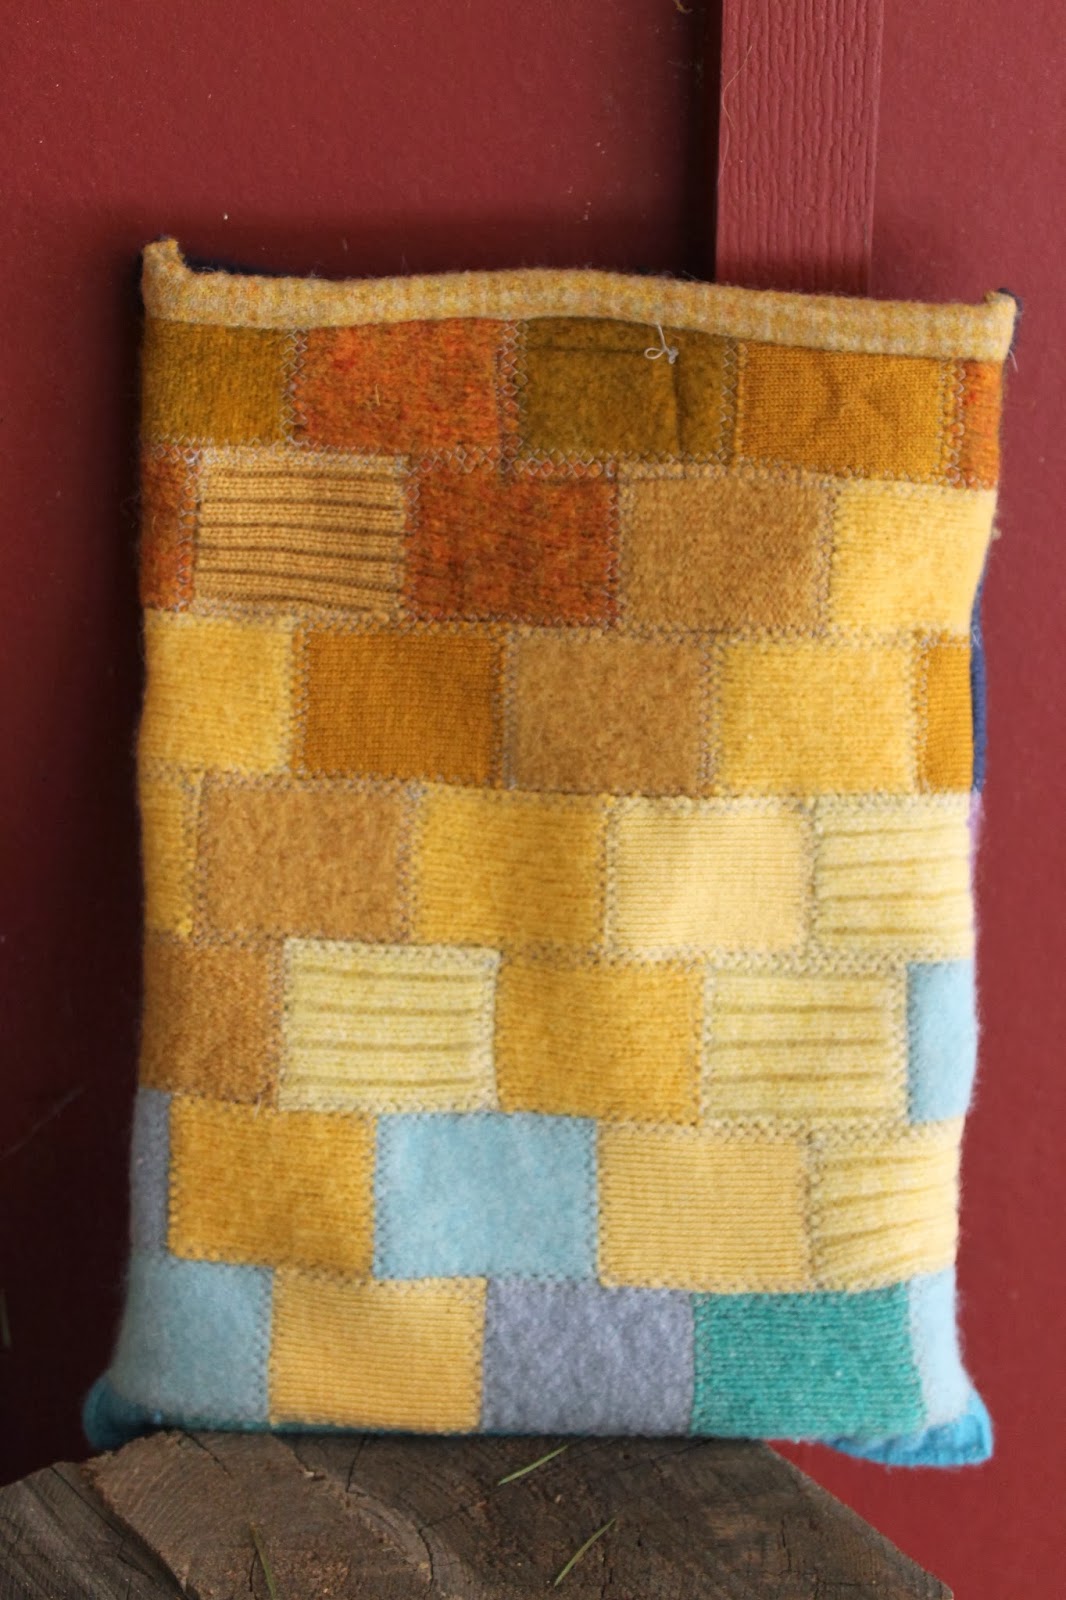
Below are shots of the finished cushion made using some foam from the craft store.  I love the final product, especially since the only supply I actually had to buy was the foam for the cushion!  What that tells me is that I have WAY too much wool in storage in my cedar closet.  I better come up with some more projects QUICK!!

As you can see, Ella approves.  Good dog.


Saturday, January 18, 2014

Radiant orchid


 First, I want to say that I made this scarf BEFORE Pantone named Radiant Orchid as the Color of the Year.  Truth.

I've been making pieced, recycled cashmere scarves for almost 10 years.  I've grown weary of the same 5-inch strips sewn back-to-back, using the ribbing as fringe.  My friend, Anne Marie, mentioned that her favorite scarf ever was a cashmere scarf that was backed in silk.  Well, that got me thinking...
 I had a piece of silk purchased years ago in some of my favorite shades of purple.  And, I had bags and bags of cashmere scraps all color sorted.  I went to work finding cashmere scraps that matched my piece of silk.  Using the scraps as my guide, I determined that I'd have to cut my strips 1 1/2 inches wide to maximize the scraps I had.  I am all about making something out of nothing and this project is right up my alley.

After cutting all the scraps into strips, I cut them cross-wise into different lengths.  Everything was a multiple of 2 1/2 inches.  This way I could lay them out like a brick wall (just like my iPad cover) and the cross seams would be offset and, therefore, stronger.  Some strips were longer if the scrap allowed for that, but most of the little pieces are the smallest size:  1 1/2" X 2 1/2".

There are 93 pieces of cashmere in this scarf.  I counted.
 The scarf is about 10 inches by 60 inches finished.  And, it is a stunner.  I wear it quite a bit because I have an eggplant-colored down jacket and I wear a lot of purple day-to-day.  By twisting the scarf as I'm putting it on, I end up with both cashmere and silk against my neck which is pure heaven.

Yes, it took a long, long time to find the right colors, cut those little tiny pieces of cashmere, and sew them all together.  But, the result is certainly worth all that effort.

Then I got to thinking, "How can I make a similar scarf inexpensively enough to be able to sell at a reasonable price on Etsy?"  I started looking on Ebay for vintage silk and came across some vintage sari's from India.  Bingo.

Below are some shots of the other scarves I made for sale.  The sari's cost about $25 and contain massive amounts of yardage.  Probably 4 yards or more.  Often, the ends are intricately patterned as you see with the green scarf.  I washed the sari's on gentle in my washing machine and dried them with no heat.  Another bonus:  silk can be torn on the grain just like wool.  This makes tearing the silk yardage a 5-minute piece of cake.  I made these scarves slightly longer (65") and slightly narrower (10" unfinished) because I found my orchid scarf to be a little thick and a little short.  Still wearable, of course, but the slightly longer length of the new version is just right.  I made 3 of the green and 5 of the maroon/black/grey.  All sold very, very quickly at a price of $75.  The maroon style was made because the colors of my boys' school are maroon and black.  So, all 5 of those sold to fellow moms at school.  And, I still have a ton of silk left for more.  The cashmere pieces are 10" wide and various lengths and that's the hardest part to source.  That's a big piece of cashmere so you can't use the sleeves unless it's a very large sweater.  I use the sleeves for my gloves and cut scarf pieces out of the fronts and backs.  A great project and very successful.  I hope you agree!


Thursday, January 9, 2014

Upcycled cashmere beret -- embellished with wool and beads

I have a big head.  Finding hats is tricky.  Finding cute hats that I actually want to wear is even harder.  So, when I saw this great beret by this amazing artist, I knew I had to give it a try.  Here's the link:
 http://www.michelemademe.com/2011/01/berry-n-bird-beret-hey.html

The detail on the denim outside is fantastic.  Appliqued birds, embroidered branches, etc.  And, it's reversible.  The artist used the basic instructions from Martha Stewart's wool beret project shown below on the right. (link:  http://www.marthastewart.com/270781/woolen-beret?xsc=eml_crd_2011_12_01&om_rid=Nsho$1&om_mid=_BO13yqB8d7QdZx)


I decided to make my own beret.  I had two cashmere sweaters, a beautiful charcoal grey and a raspberry.  And, of course, lots of wool.  For the first time EVER, I made a muslim pattern using Martha Stewart's template.  I didn't have extra fabric and could not mess this up.  Plus, as mentioned, I have a big head and was fully expecting the pattern to be too small.  I was right.  But, by extending the panels to be about an inch longer, I got the greater circumference I needed.  

I put the grey on the outside and raspberry on the inside.  I had to do all embellishment before sewing it together, though, and this is where the fun began.  I found this great inspiration for the leaves. ( http://suespargo.blogspot.com/2011/10/misa-madeline-island-wi.html )  Photo on the left.  They are incredibly detailed.  Hand-dyed wool adds to the depth.  Embroidery well beyond my meager skill set.  But, I got out all my green wools and started to play.  My beret is on the right.  


Not bad, huh?  I really love how it came out.  I wear it all the time.  It matches any color coat and is super warm.  My favorite discovery was beading while doing blanket stitch.  In the small picture on the right you can see the result.  By adding a bead on each stitch, the beads end up perfectly outlining the applique.  Fabulous.  You know I'm not an embroiderer by trade so these little tricks really add to my arsenal.

For the inside (which has yet to be worn on the outside!) I just did a simple bird in a grey overdyed plaid.  He's cute.  I just always seem to wear the beret grey side out.

I made this in December of 2012.  My goal was to try a new technique and make something fabulous every month.  I think I succeeded that month for sure.  Stay tuned for more of the projects I completed in early 2013.


Sunday, January 5, 2014

iPad cover project

First, let me make sure to credit the originator of this great project:  http://mypoppet.com.au/2011/05/how-to-scrappy-felt-ipad-cover.html .  It's really terrific and is the center picture below.  But, I was also inspired by this Garnet Hill catalog cover and this blanket and, frankly, everything done by artist Crispina ffrench  (http://crispina.com/).


My plan, as is always my plan, was to use up some wool scraps.  I had a new ipad and my charming puppy had pulled it off my desk, cracking the screen.  So then I had a new ipad with a cracked screen.  Got the screen replaced thanks to AppleCare and now I needed a case.

I liked the way My Poppet alternated her rows of wool.  They look like brickwork and I think it serves the purpose of offsetting the seams, making for a stronger fabric.  When I used to do my purses with 3X3" squares of wool, the corners of the wool all came together and I have had issues with seams coming apart right at that corner join.  Here's a couple of my purses.  I had a great run with these, making them for probably 5 years.  But, I tired of the sheer volume of sweaters required to give a good mix to the bags.  Most of my bags had squares cut from about 15 different sweaters.  That's a lot of bulk and storage.

So, after that phase, I began making the fingerless gloves that I've posted about in the past.  We won't go into those again.  This time (January of last year) I wanted to use all solid pieces of wool and was the most inspired by the Garnet Hill cover where the colors segue from blue into gold.  So, I got out all my scraps and went to work.  I knew I wanted a rectangle so the brickwork seaming would be straightforward.  I grabbed a bunch of wool scraps and also delved into heavier weight cashmere just to fill in the color gaps.  Naturally, I had more than I needed.


Here they all all laid out.  I really love that deep golden color at the very lower right.  I think it grounds the piece, especially as you head into the pale blue.

After layout, I went to the machine and starting sewing them all together.  My Poppet used a wide zig zag on her case but I've got a great stitch pattern on my machine that I've found is perfect for sewing wool together.  There's a closeup of it below.  Kind of a honeycomb pattern that is super secure.

So here's the finished case.  You can see a close-up of my stitch pattern below.  I also used a magnetic snap for a closure and chose not to line the bag.  In retrospect, it would have been a little more substantial and sturdy with a lining, but I like it as it is.  I love the colorway.  The two sides of the case have totally different personalities and I really have no preference one way or the other.  I am partial to that gold, though...


Saturday, January 4, 2014

She's baaaaack!

New Year's Resolution numero uno:  Update the Blog

Yes, it's been over 2 1/2 years.  I've been busy.  Don't judge.  My oldest is now graduated from HS and is off to his Freshman year at the University of Richmond.  Since my last post I have probably seen over 300 baseball games and driven 80,000 miles (no joke) getting my 3 boys where they need to go.  All good things I am blessed to do.

I am going to start this update off with pictures of one of my holiday mantles.  Hopefully I haven't posted these before.  Then, I'm going to update with some pictures of the many projects from 2012 and 2013.  I hope you enjoy.

 This mantle was created from glass candlesticks, glass and glitter ornaments, and other sparkly things.  The two trees were an after Christmas score from Wisteria catalog.  I actually have 2 more that are a smaller size.  They're all made from birch bark and are super cool.  Especially at 75% off!  The ornaments range from mouth-blown glass to cheap glittered Michael's finds to modern mercury glass.  In the picture to the right below you'll see the latest addition, a glittered bristled diamond shape found at Crate & Barrel just this year.


My wooden cherub is very dear to me.  It was given to me by my mom and appears to be hand-carved.  In the past, I've made a new greenery swag every single year, accenting it with a great snowflake I found locally at 75% off.  But this year I bought some preserved boxwood which came in a package with some other preserved greenery.  I am hoping it will keep year to year.  I do know there were no needles or dried leaves to clean up when I took it all down!

My holiday style usually has plenty of handmade ornaments made from felt and wool.  This mantle is a departure from that but it is my favorite.  The rope lights make everything GLOW.  It's the first decoration up and the last to come down.

Next year I'm plotting a second mantle that will be all white-based trees.  I've got some metal, felt, bristle-brush, and I'm plotting to make several using all the ribbing scraps from the ivory sweaters I've used over the years.  I've already ordered some tall styrofoam cones for this project.  The strips of ribbing will go around the cones and then I'll cut them into "needles."  I may add some vintage brooches for sparkle or maybe some pearl beads.

I also ordered some small cones (4" in height) and will make some small tree ornaments using bright colored ribbing scraps.  I have an entire bin of ribbing scraps so I anticipate a lot of fun with this project.


Welcome to 2014.  See you soon!  I promise.