Wednesday, November 19, 2014

Ugly Christmas Sweater Ornaments.

I needed another project for my ornament party.  My go-to source for ideas is Pinterest and I kept seeing very cute miniature sweater ornaments.  Lots of them were hand-knit but I knew I would never have time to make 20 hand-knit little sweaters.  But, I had a bin of ivory wool from old sweaters.  Coming up with a pattern was super easy.  I just drew a little sweater on cardstock and cut it out.  I stitched 2 pieces of wool together using the pattern and then cut the shape out, leaving a space at the neck and leaving the bottom open.  Very fast.  I think each one only took about 2 minutes to sew.  Now the fun begins!  I took my wool felt and my embroidery supplies and created a couple of very cute options.

The holly leaves are my favorite, I think.  Tiny pieces of green wool felt plus some red beads.  So quick but really adorable.  The leaves could even be a little bigger.  The star is outlined with pearl beads using blanket stitch to line them up right along the edge.

I love the string of lights!  This is just multi-colored sequins sewn randomly along a strand of thicker black embroidery thread.  There's a bead holding each sequin on.  And the tree was easy as well.  Hand-drawn using a chalk pen.  There's a little brown wool trunk and then sequins for ornaments and a star sequin for the tree topper.

These would also be cute in red wool or green wool.  I can't wait to see what my party invitees come up with.  These four sweaters are going into the sale I have tomorrow night at my boys' school.  To appeal to the moms, I also made a couple of sweaters in maroon wool appliquéd with the logo of the school.  These will sell very quickly, I think.

Now, my favorite part of these ornaments is the little hanger.  It looks just like a real clothes hanger and is made of 17-guage wire.  I made a couple of them by hand using a needle-nosed pliers but I knew this would not work for the 20 I needed to make.  So, I made a jig.  This is just a hunk of scrap 2X4 that I found in the workshop.  I hammered in nails about 2 1/4 inch apart.  The rest was super easy.  10 inches of wire wrapped around the nails and then crossed slightly off center to allow for the wrap to bring the cross section to the center.

The nails are bent slightly to the center so I could get the shape off.  You could also use finish nails which don't have a head on them.  My dad would be proud that I know what a finish nail is.  After getting the shape off the nails, I used a pliers to wrap one wire around the other and cut off the excess.  Then, I took the other end and made a hook at the top, also cutting off the excess.  These went so quickly!  I think I made 20 little hangers in about 10 minutes.  Now I have a whole pile ready for my party.


Monday, November 17, 2014

Ornaments -- I can't stop myself!

I'm having an Ornament-making Party in a few weeks.  I don't know why I've never thought of this before given that I make ornaments every year for teacher gifts, present toppers, and for my own enjoyment.  I'll post about all the party projects eventually but here are a few ornaments that I've made in anticipation of the Ladies Night Out shopping event that I'm participating in later this week.


These are tiny trees made from scraps of cashmere.  The base is a vintage thimble.  To make them, I first secured a wire in the bottom of the thimble.  Then, I filled in the thimble with some beads to act as a kind of tree skirt.  Once all that was dry, making these was a snap.  I cut some of my varied green cashmere scraps into 6 different sizes of squares.  I used a muffin tin to keep them all separated and then sat there stacking up the squares and threading them onto the wire.  A loop at the top and a little circle of gold wool to act as a star -- super cute and super easy once the gluing is done.  I also made some of these in shades of ivory but I'm using a white tree so the green looks better.  I'm actually using these as the party favor for my ornament party but I had a few extra so I'm putting them in my sale.  I know they're going to sell.  So cute.  Vintage thimbles can be found for about $1 each on Ebay.  I love the little brass-colored ones.

Next up is owls.  I have a giant stash of plaid wool from thrifted skirts.  As you remember from my penguin stocking, I like to mix and match and these little owls are so cute!  I modified a design I had seen on Pinterest and made myself a pattern.  It's all hand-sewn and stuffed with a little bit of my cashmere and wool scraps.  I can't bear to throw even a little bit of cashmere away...  I really love the black and white owl with the contrast red stitching.  The earth-toned owls look just like some of the color variations you find in nature, don't they?  These owls are one of the projects for the ornament party.

 Some of the women coming to my party don't sew.  Not even a button.  So, this will be a little bit of a stretch for them.  It's all done in one long thread.  First you sew on the belly, then continue up and around the outside.  When you reach the point, you add some extra stitches to act as a beak before continuing down the other side.  Just before finishing, you stuff a bit inside.  You don't use much stuffing because the final step is to fold down the point and secure it with 2 buttons.  I think the stitching on the buttons really makes it look like eyes.  I used twine as a hanging cord on these so they had a more rustic feel.  Super cute.

Finally, today, I'll showcase the cupcakes.  I had hoped to use this as a project for the party but there's just too many steps and too much glue.  Using Pinterest as a resource, I saw lots of options for these.  I ended up using a cut-up toilet paper tube as my interior structure.  I would have never thought of that.  Naturally, the ribbing from some cashmere sweaters makes the perfect "wrapper."  I glued a cashmere circle on the bottom of the tube and then hand stitched the ribbing onto the tube and around the circle.  After the glue dried, I cut out 5" circles of cashmere, ran a running stitch around the outside, and pulled to make a kind of yo-yo.  I stuffed that and the tube with cashmere/wool scraps and then glued the muffin top to the bottom.  Again, I let the glue dry.

After drying, I threaded a long doll-making needle with my cord and ran the cord all the way up from the bottom, through the top, and back down.  Knot and loop at the top and a knot at the bottom.  This also served to secure the entire structure top to bottom.  On some, I ran some trim around the join between top and bottom because I didn't love the way it looked.  After all of this, I got out my beads and sequins and embellished the top of the muffin.  Way more involved than I had hoped this project would be.  I scrapped the idea of using it for the party because we just can't be bothered with waiting for glue.

Next post I'll tell you all about my little Christmas sweaters.  I came up with a great way of making little tiny hangers for them!


Friday, November 7, 2014

It's all about the Penguins this year!

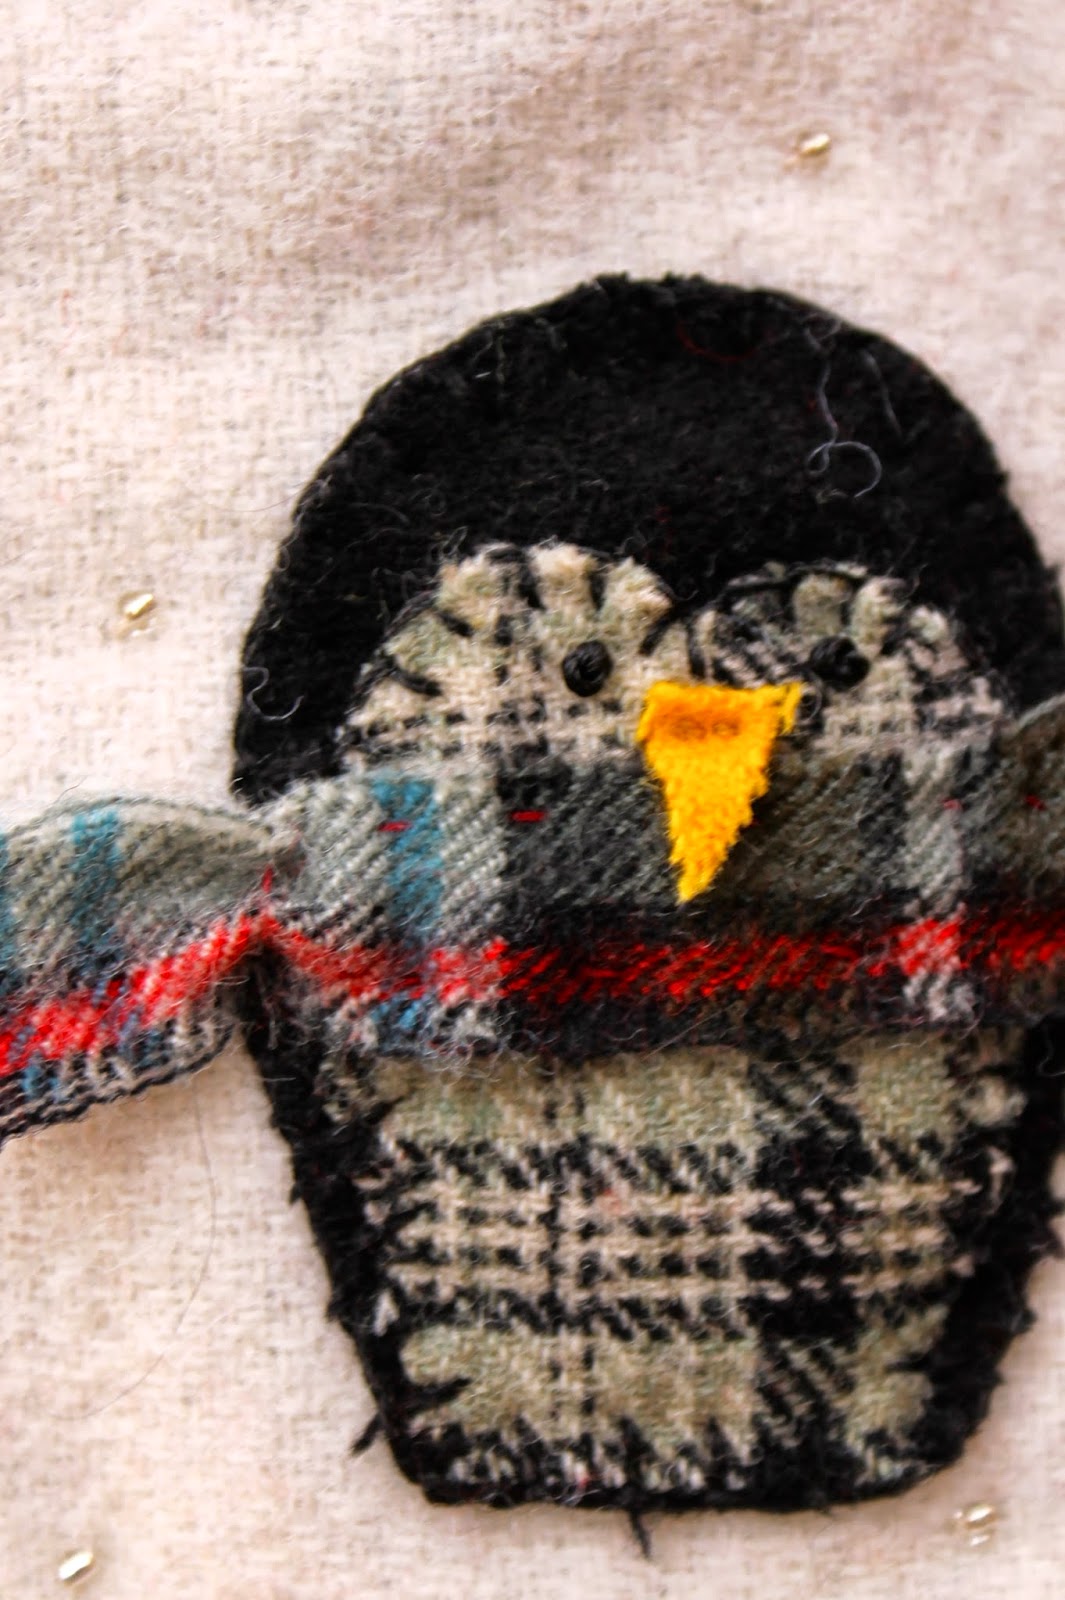
It all started with the little guy on the left.  I bought him last Christmas in a great artsy shop here in my town.  There's definitely some wool content in the black part and it's almost 1/2 an inch thick.  I just love how the nose sticks out over the scarf.  The eyes are embroidered but everything else is glued.

So, I made the one on the right.  You all remember my obsession with black and white woven fabrics, right?  Well, I have an entire bin of them and I thought these penguins would be adorable with a woven patterned belly. 

I decided the penguin was a little fubsy, though.  In this new version, I slimmed him down and removed the little hand bits (for easier sewing and cutting).  Now I had a pattern I liked and I went to town.  I've made about 15 of these to use for holiday gifts.  I don't plan to sell them so I had no moral dilemma about copying the original design.  Plus, mine have some distinct differences.  100% wool.  I bought some 5mm wool felt (which is fantastic stuff, BTW) to use as a stiffener in the middle.  The black parts on the outside come from a black wool thrifted skirt.  The black and white woven patterns are all upcycled as are the scarves.  As is the nose!!  So, no new material at all except the cord hanger and the embroidery floss used to French knot the eyes.

I think the whole colony is adorable.  I had so much fun choosing just the right plaid for the scarves.  I hope my friends and teachers love them as much as I.


Now, moving past the ornaments, I began to think about my Christmas stocking entry for The Grey Colt Stocking Contest.  I'm pretty sure I've talked about this before.  This will be the 14th year and I am a founding contributor and have made a stocking (or a pillow or a wreath) every year.  I took my little penguin and shrunk him down quite a bit.  Here is this year's stocking:
 The penguins are about 2 1/2 inches tall.  The scarves are teeny little strips of wool -- super cute!  I did some beading on the outside so the ivory wool looked like slopes.  They almost look like they're at a sledding party, don't you think?  At the top, I took some raw edge wool and fringed it to add some detail that would pick up the patterns in the penguins.  The blue background is hand-dyed by me.  It sparkles in the light thanks to the tiny beads.  I'm so happy with the final result and can't wait for the Stocking Party on December 3rd.  The workmanship of all the participants is inspiring.  All stockings are donated and then raffled off after they are displayed for a week or so.  I've won a few stockings over the years and I cherish them.  The proceeds this year are going to the Kent State School of Fashion to help fund a scholarship.  Very fitting since The Grey Colt is my favorite clothing store ever.  Happy Holidays!!


Wednesday, October 22, 2014

An amazing scarf series.


 Last year I made a few of these scarves.  A friend suggested I pursue a silk scarf backed in cashmere.  Being who I am, I had to find some kind of source for second-hand silk.  Enter Ebay and the fabulous search term, "recycled sari."  All of the silk in these scarves came from used saris.  Saris use about 5 yards of fabric because the fabric is wound around and around the body and then up and over one shoulder.  That's why you also see fantastic border prints or embroidery on most silk used for saris.  How do I know this?  I'm not Indian but once I was in an opera about Gandhi.  It was with Seattle Opera and I was in the chorus.  All the women got to wear these amazing saris as part of our costume.  Strange experience -- music by Philip Glass.  Need I say more?

But, I digress.  Saris have great border detailing and this panel is no exception.  It is a fawn/taupe color and the embroidery is brass with a little black.  Very detailed and intricate.  I did hesitate before cutting it up, but I have 3 amazing scarves and tons of silk still available so I'm sharing the wealth.

I washed the silk on gentle in the washer and hung it to dry.  Silk tears along the grain just like wool so cutting the panels into scarf-sized pieces was super easy.  The cashmere was cut 10 inches wide in as big of pieces as I could eke out of my bin of sweaters.  The finished scarf is about 9 1/2 by 65 inches.

On 2 of the scarves I used ivory cashmere for the backing.  I am a total sucker for all ivory and I really think using the neutral allows the embroidery to shine.  For the silk panel with the most blue (from the center of the fabric) I went with blue cashmere in a range from bright royal blue to pale blue to indigo and sky blue.  Stunning.  The effect is less subtle than the ivory versions but I think it will appeal to those who want a bigger splash of color near their face.

The scarves are listed in my Etsy shop for $75 plus shipping.  Last year I sold out of all the silk/cashmere scarves I made.  I have a feeling these ones are going to fly.


Tuesday, July 15, 2014

Wedding gift for Ellie

I've known Ellie since she was about 2.  Her dad worked with my husband and her mom, Kathy, and I became very, very good friends.   When I became pregnant with my oldest, Kathy already had Ellie and baby sister Meggie.  Kathy was my go-to for advice, wise counsel, and support.  Our husbands travelled all week long so we spent a lot of time together going to playgrounds, lunch dates, etc.

So, when I heard about Ellie getting married this summer right after her college graduation, I knew I wanted to make her gift rather than just choose something off her registry.  She had chosen some pillows from Pottery Barn, some of which were knit fabric.  I figured she might like wool pillows made out of old sweaters.  I sent Kathy some ideas and told her to run them by Ellie and get her thoughts.  Some of the ideas had no appeal (like proddy, anything with hearts or flowers, and "girly" colors).  But, she liked the patchwork idea and a design I sent with a leafy vine.  This may shock you (or not), but other than a zipper for the smaller pillow and some buttons for the larger, I didn't have to buy a single thing to make these pillows.  All the wool and sweater scraps came from my stash.


For the patchwork pillow, I chose a rectangle size to maximize the scraps I had.  I still had some 3" squares left from my purse days and I had a LOT of blues and greys.  I lined up the rectangles with a brickwork offset pattern.  I used this on my ipad cover from last winter and the offset seams are definitely stronger than sewing together in a checkerboard pattern.  I also think the offset seams add some movement to the overall fabric.  It gives your eye more to look at.


The vine pillow was a piece of cake.  I had some vintage wool for the background and just randomly added leaves to a stitched fine until I felt there was enough.  Some leaves are completely stitched and others just have the center vein stitched so the edges stick up a little.  Gives a little texture.

One of the new couple's first purchases together was a couch.  I am hoping they are enjoying the start of their life together, comfy on their couch with fabulous pillows!


Wednesday, June 25, 2014

My favorite bag shape

This is my favorite bag shape.  I bought a bag last summer at TJ Maxx.  You know I don't buy bags very often, preferring to make my own.  But, sometimes summer bags are hard given my preference for wool.  The bag was the perfect size with a nice, wide gusset to add space inside.  Perfect length handle allowing for shoulder use or just holding in the hand.  I had to duplicate. I drafted a pattern on poster board and I was off and running.


 The outside of this winter bag is alpaca taken from a beautiful coat I bought several years ago at a sidewalk sale.  $400 coat for $75.  I was thrilled and happily wore it for a couple of years.  Then I got a puppy who promptly chewed a hole in it.  The coat was reversible.  Dark charcoal and pale, dove grey.  Gorgeous.  I couldn't just give it to the Goodwill so I cut it up and made this fabulous bag.  The embellishment took FOREVER but what else does one do on a stormy and cold weekend in Ohio?!  I machine stitched the base of the tree and then hand embroidered the veining using hand-dyed embroidery floss that I found in my stash.  The cardinal is a bit of red wool plus some embroidery.  The handle is an old belt attached to some really great, heavy duty hardware from The Buckle Guy.  Lining is from Purl Soho.  Basically the outside of the bag was free stuff from my stash but I spent my whole budget on fabulous lining and hardware.  It's the details...

So here's the bag I just finished from the same pattern.  The fabric is crewel upholstery fabric I got on Ebay an embarrassing number of years ago.  Same drill on lining and hardware -- that's where I spent the money.  The lining is Liberty and was ridiculously overpriced but this bag is for me.  Actually, I made two of them.  One for me and one for a very good friend with a July birthday.  She wears a lot of blue.  Hopefully she doesn't follow my blog or I just ruined the surprise.  Handle is, again, an upcycled belt attached to fab hardware with rivets.  Surprisingly easy and great, professional looking results.  This actual bag is my friend's bag.  Mine has silver-toned hardware because I'm planning to switch out the black belt from my winter bag.  Super smart, right?     Hopefully you find some inspiration from this.  Once you find a style and shape you like, there's nothing wrong with making a closet-full of accessories.  Words to live by.


Friday, March 21, 2014

Sheep! Another project from the sewing group.

I've written about our sewing group before.  We've been together for almost 10 years sharing our love of handcraft.  You can find several posts about them by searching for "sewing group."  One big project I did can be found here.  Every year, we give each other a new creative challenge.  One year it might be color, another year it's a theme.  These squares are from my 2012 challenge -- SHEEP!!  I collect sheep in all forms and I knew my very creative friends would have a great time with this one.

The background wool is hand-dyed using the Cushing color "Bittersweet."  I knew I would use a blue as a background color.  My instructions to the group were to do sheep of any kind -- a grouping, a single sheep, just a face, etc.  The fabric was square so I didn't have to worry about portrait or landscape orientation.  Everyone was also given a bit of a paint chip showing a deep, Colonial blue.  They were asked to incorporate that blue in their design.

I just finished putting the pieces together and creating a wall hanging for one of our rooms.  There are very high ceilings in this room so above some French doors seemed like a great place.  Here's the finished piece hung in place.

 This one is mine.  Obviously.  I used some Merino wool yarn and did a hooked rug design.  The face is a flat appliqué of black wool as are the legs.  The bird is blanket-stitched to the background.  I would say that mine ended up being a little heavy!  It takes a surprising amount of yarn to hook a sheep in this way.  But, I love the texture and the way the sheep looks like it is VERY ready for a haircut.
 Here we have Beth and Barb.  Beth is primarily a quilter and Barb does a little of everything but is super talented at embroidery.  Two funny stories about these pieces.  Beth lost her paint chip and didn't even realize I had a color preference!  But, she still used the blue!  Barb accidentally cut the legs off one of the sheep and had to re-appliqué.  Hilarious.

Here's Kathy and Katie.  I feel compelled to tell you that I taught Kathy about needle-felting.  And, she produces something like this!  The student becomes the master, I think!  I love the expression on the sheep's face.  Kathy and Katie both used the required blue in the form of a ball of yarn.  Fabulous.  Katie's has my shop name embroidered on the bottom which makes it a favorite as well.


Angela is here on the left.  Another master embroiderer in the group.  The circles of stitching are so perfect!  And to the right is Anne.  Again with the embroidery!  Ann always does amazing detail work on all her pieces.  She humbles me.  I had to buy a book on embroidery stitches to keep up with this group.


Finally, here is Heinke's.  I love this one.  A little flock of sheep with vintage doily collars.  How clever.  I also love that there are three little sheep just as I have three boys.  I wonder which of mine is the black sheep?!  I suppose it changes daily.


I hope you love the look as I do.  I'm so proud to be in such a creative group.  My next set to put together is a Christmas-themed set on beautiful blue wool.  Everyone was to do a Christmas tree -- a portion, a branch, or a whole tree.  They are amazing.  Another post for another day.