Showing posts with label felted wool. Show all posts
Sunday, December 14, 2014
Holiday decor tour, continued
As I said, I'm a sucker for white and metallic. I've talked about this mantle before. Here is that post. This year I switched out a few of the ornaments and used different trees since I used my birch bark trees on the other mantle. The spidery looking balls at the back are the dried seed heads of allium. I spray them gold and they add an airiness to the display. Here's a detail shot from the side. This mantle never gets old to me. If it wasn't so holiday, I would leave it up all year.
Here's a little vignette I have on a side table. The feather tree in the background is wool. I saw this on Pinterest last year and knew that I had to make a wool feather tree. My house was built in 1836 so early American touches just fit. But, a feather tree of wool? It's like they knew I was coming. I found the pattern on Etsy for about $12. Downloadable pdf with many sizes. Here is the pattern for sale. The instructions were very clear and I made a 24" tree and a 12" tree. My plan is to take kumquats, slice them thinly, and dry the slices as you would oranges. I think the little slices would make the perfect ornaments and would be just the right scale. But, as luck would have it, kumquats are in short supply this year so I haven't been able to do this. I keep looking every time I'm at the grocery.
The Santas are from my friend, Brigitte, as I mentioned earlier. Brigitte mixes different fabrics, fur, and embellishments for these. I love them. One of them has crewel fabric for the base and you know I'm a big fan of crewel.
The detail picture shows the star on top of the feather tree. Again, I took some wool and cut out 2 stars. I blanket stitched around the outside using gold thread and adding a bead to every stitch. I love how the beads line up perfectly along the edge. The star is stuffed slightly with scraps. And, a vintage pin for sparkle.
This little tree was made using scraps of cashmere. It's a styrofoam cone on the inside. I cut little squares of cashmere and attached them using short upholstery tacks because pins would be too long. The top of the cone is only about 1/2-inch wide. The texture is fantastic. Again, this is a technique I used for one of the ornaments at my party. I'll post pictures of those ornaments soon. The top of the tree is a mish mash. I wanted a pom pom and got out some gold cord to make one. But, the cord didn't want to be a pom pom. It looked like a haystack instead. I couldn't bear to throw it away and really liked the way the cording draped. So, I got a little glitter star out of my holiday floral bin and stuck it through the haystack. I love the way it looks!
These two mantles are the mainstay of my holiday decor. I've got little handmade touches in almost every room, though. Ornaments hanging from cabinets, little touches of red and green, and lots and lots of sparkle. I hope you love what you see. I certainly do.
Labels:
allium,
felted wool,
holiday decorating,
making do,
upcycled cashmere
Friday, November 7, 2014
It's all about the Penguins this year!
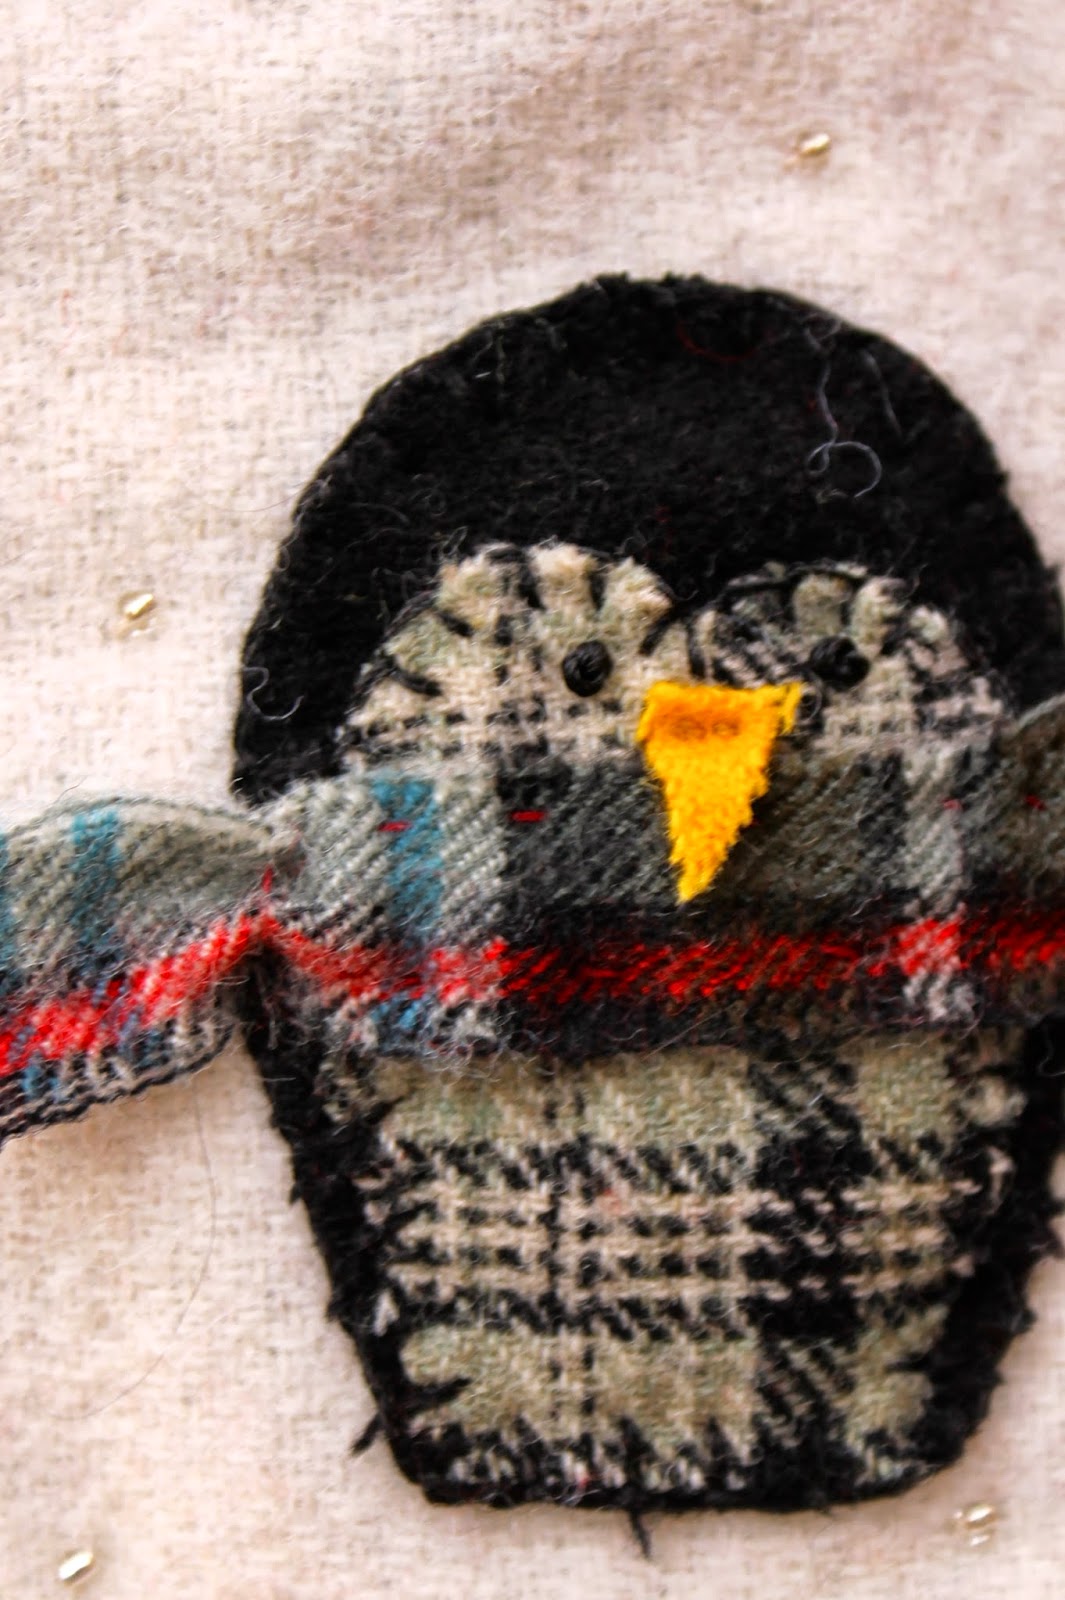
It all started with the little guy on the left. I bought him last Christmas in a great artsy shop here in my town. There's definitely some wool content in the black part and it's almost 1/2 an inch thick. I just love how the nose sticks out over the scarf. The eyes are embroidered but everything else is glued.
So, I made the one on the right. You all remember my obsession with black and white woven fabrics, right? Well, I have an entire bin of them and I thought these penguins would be adorable with a woven patterned belly.
I decided the penguin was a little fubsy, though. In this new version, I slimmed him down and removed the little hand bits (for easier sewing and cutting). Now I had a pattern I liked and I went to town. I've made about 15 of these to use for holiday gifts. I don't plan to sell them so I had no moral dilemma about copying the original design. Plus, mine have some distinct differences. 100% wool. I bought some 5mm wool felt (which is fantastic stuff, BTW) to use as a stiffener in the middle. The black parts on the outside come from a black wool thrifted skirt. The black and white woven patterns are all upcycled as are the scarves. As is the nose!! So, no new material at all except the cord hanger and the embroidery floss used to French knot the eyes.
The penguins are about 2 1/2 inches tall. The scarves are teeny little strips of wool -- super cute! I did some beading on the outside so the ivory wool looked like slopes. They almost look like they're at a sledding party, don't you think? At the top, I took some raw edge wool and fringed it to add some detail that would pick up the patterns in the penguins. The blue background is hand-dyed by me. It sparkles in the light thanks to the tiny beads. I'm so happy with the final result and can't wait for the Stocking Party on December 3rd. The workmanship of all the participants is inspiring. All stockings are donated and then raffled off after they are displayed for a week or so. I've won a few stockings over the years and I cherish them. The proceeds this year are going to the Kent State School of Fashion to help fund a scholarship. Very fitting since The Grey Colt is my favorite clothing store ever. Happy Holidays!!
Labels:
felted wool,
ornament ideas,
recycled wool,
upcycled wool,
wool plaid
Tuesday, July 15, 2014
Wedding gift for Ellie
I've known Ellie since she was about 2. Her dad worked with my husband and her mom, Kathy, and I became very, very good friends. When I became pregnant with my oldest, Kathy already had Ellie and baby sister Meggie. Kathy was my go-to for advice, wise counsel, and support. Our husbands travelled all week long so we spent a lot of time together going to playgrounds, lunch dates, etc.
So, when I heard about Ellie getting married this summer right after her college graduation, I knew I wanted to make her gift rather than just choose something off her registry. She had chosen some pillows from Pottery Barn, some of which were knit fabric. I figured she might like wool pillows made out of old sweaters. I sent Kathy some ideas and told her to run them by Ellie and get her thoughts. Some of the ideas had no appeal (like proddy, anything with hearts or flowers, and "girly" colors). But, she liked the patchwork idea and a design I sent with a leafy vine. This may shock you (or not), but other than a zipper for the smaller pillow and some buttons for the larger, I didn't have to buy a single thing to make these pillows. All the wool and sweater scraps came from my stash.


For the patchwork pillow, I chose a rectangle size to maximize the scraps I had. I still had some 3" squares left from my purse days and I had a LOT of blues and greys. I lined up the rectangles with a brickwork offset pattern. I used this on my ipad cover from last winter and the offset seams are definitely stronger than sewing together in a checkerboard pattern. I also think the offset seams add some movement to the overall fabric. It gives your eye more to look at.
The vine pillow was a piece of cake. I had some vintage wool for the background and just randomly added leaves to a stitched fine until I felt there was enough. Some leaves are completely stitched and others just have the center vein stitched so the edges stick up a little. Gives a little texture.
One of the new couple's first purchases together was a couch. I am hoping they are enjoying the start of their life together, comfy on their couch with fabulous pillows!
So, when I heard about Ellie getting married this summer right after her college graduation, I knew I wanted to make her gift rather than just choose something off her registry. She had chosen some pillows from Pottery Barn, some of which were knit fabric. I figured she might like wool pillows made out of old sweaters. I sent Kathy some ideas and told her to run them by Ellie and get her thoughts. Some of the ideas had no appeal (like proddy, anything with hearts or flowers, and "girly" colors). But, she liked the patchwork idea and a design I sent with a leafy vine. This may shock you (or not), but other than a zipper for the smaller pillow and some buttons for the larger, I didn't have to buy a single thing to make these pillows. All the wool and sweater scraps came from my stash.For the patchwork pillow, I chose a rectangle size to maximize the scraps I had. I still had some 3" squares left from my purse days and I had a LOT of blues and greys. I lined up the rectangles with a brickwork offset pattern. I used this on my ipad cover from last winter and the offset seams are definitely stronger than sewing together in a checkerboard pattern. I also think the offset seams add some movement to the overall fabric. It gives your eye more to look at.
The vine pillow was a piece of cake. I had some vintage wool for the background and just randomly added leaves to a stitched fine until I felt there was enough. Some leaves are completely stitched and others just have the center vein stitched so the edges stick up a little. Gives a little texture.
One of the new couple's first purchases together was a couch. I am hoping they are enjoying the start of their life together, comfy on their couch with fabulous pillows!
Sunday, January 5, 2014
iPad cover project
First, let me make sure to credit the originator of this great project: http://mypoppet.com.au/2011/05/how-to-scrappy-felt-ipad-cover.html . It's really terrific and is the center picture below. But, I was also inspired by this Garnet Hill catalog cover and this blanket and, frankly, everything done by artist Crispina ffrench (http://crispina.com/).
My plan, as is always my plan, was to use up some wool scraps. I had a new ipad and my charming puppy had pulled it off my desk, cracking the screen. So then I had a new ipad with a cracked screen. Got the screen replaced thanks to AppleCare and now I needed a case.


I liked the way My Poppet alternated her rows of wool. They look like brickwork and I think it serves the purpose of offsetting the seams, making for a stronger fabric. When I used to do my purses with 3X3" squares of wool, the corners of the wool all came together and I have had issues with seams coming apart right at that corner join. Here's a couple of my purses. I had a great run with these, making them for probably 5 years. But, I tired of the sheer volume of sweaters required to give a good mix to the bags. Most of my bags had squares cut from about 15 different sweaters. That's a lot of bulk and storage.
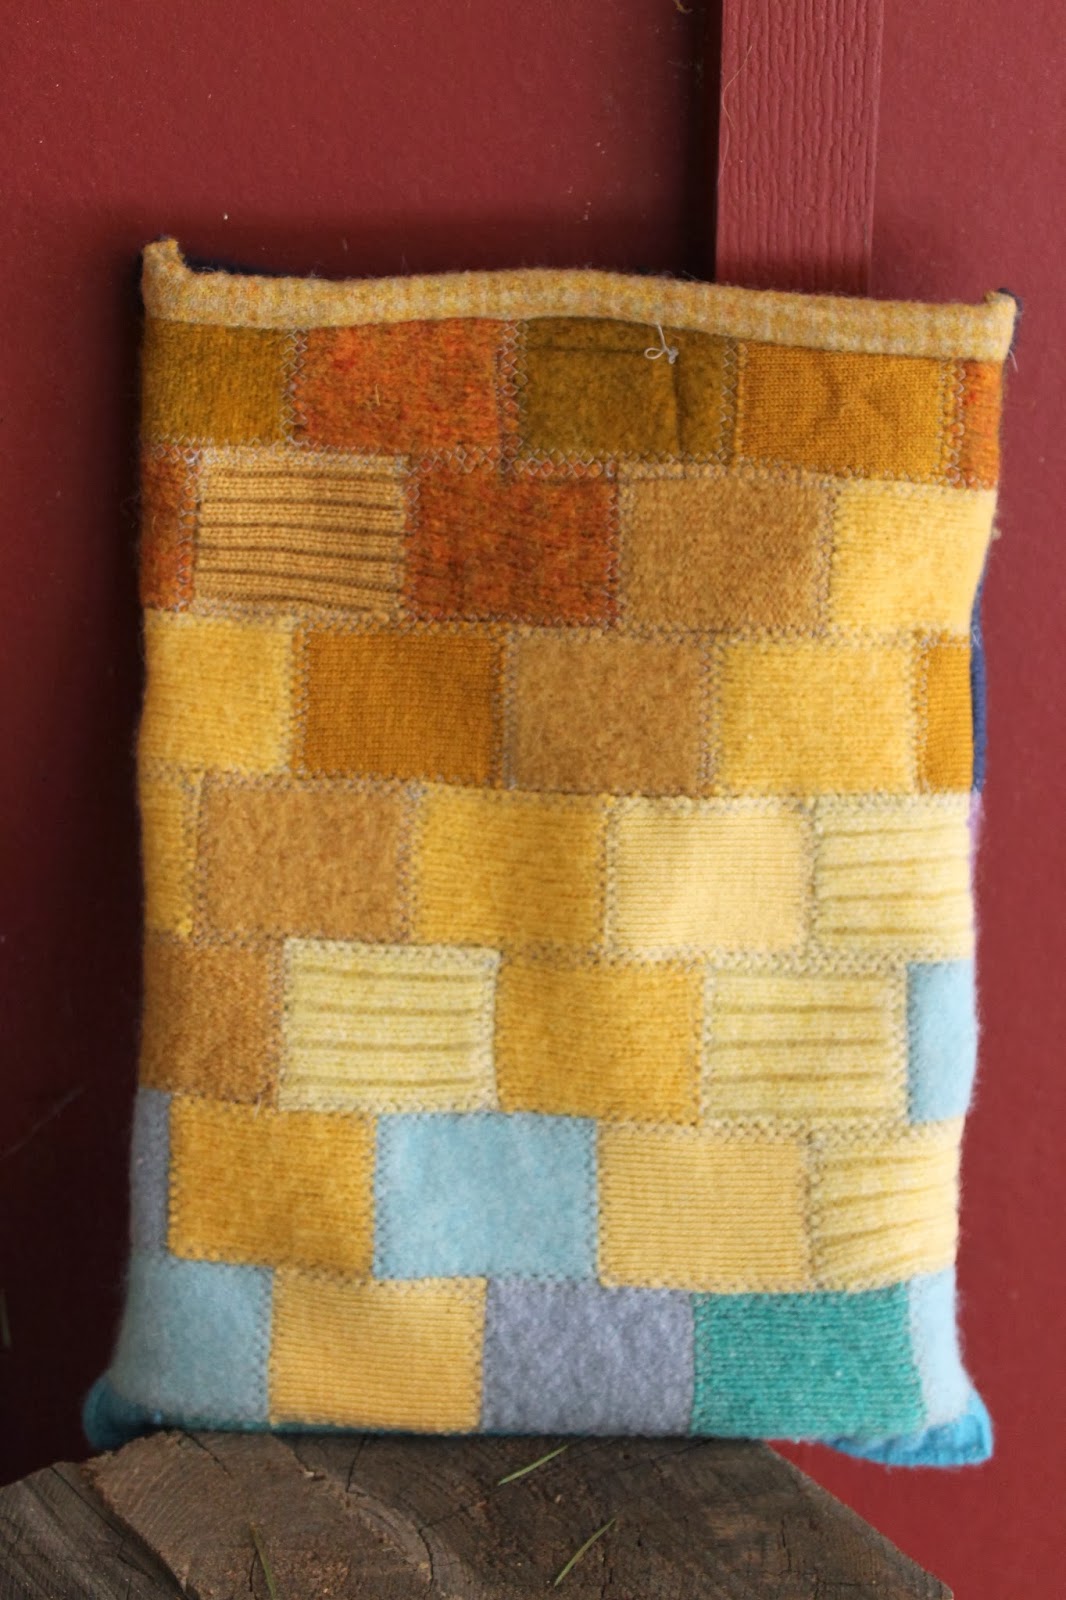
So, after that phase, I began making the fingerless gloves that I've posted about in the past. We won't go into those again. This time (January of last year) I wanted to use all solid pieces of wool and was the most inspired by the Garnet Hill cover where the colors segue from blue into gold. So, I got out all my scraps and went to work. I knew I wanted a rectangle so the brickwork seaming would be straightforward. I grabbed a bunch of wool scraps and also delved into heavier weight cashmere just to fill in the color gaps. Naturally, I had more than I needed.
Here they all all laid out. I really love that deep golden color at the very lower right. I think it grounds the piece, especially as you head into the pale blue.
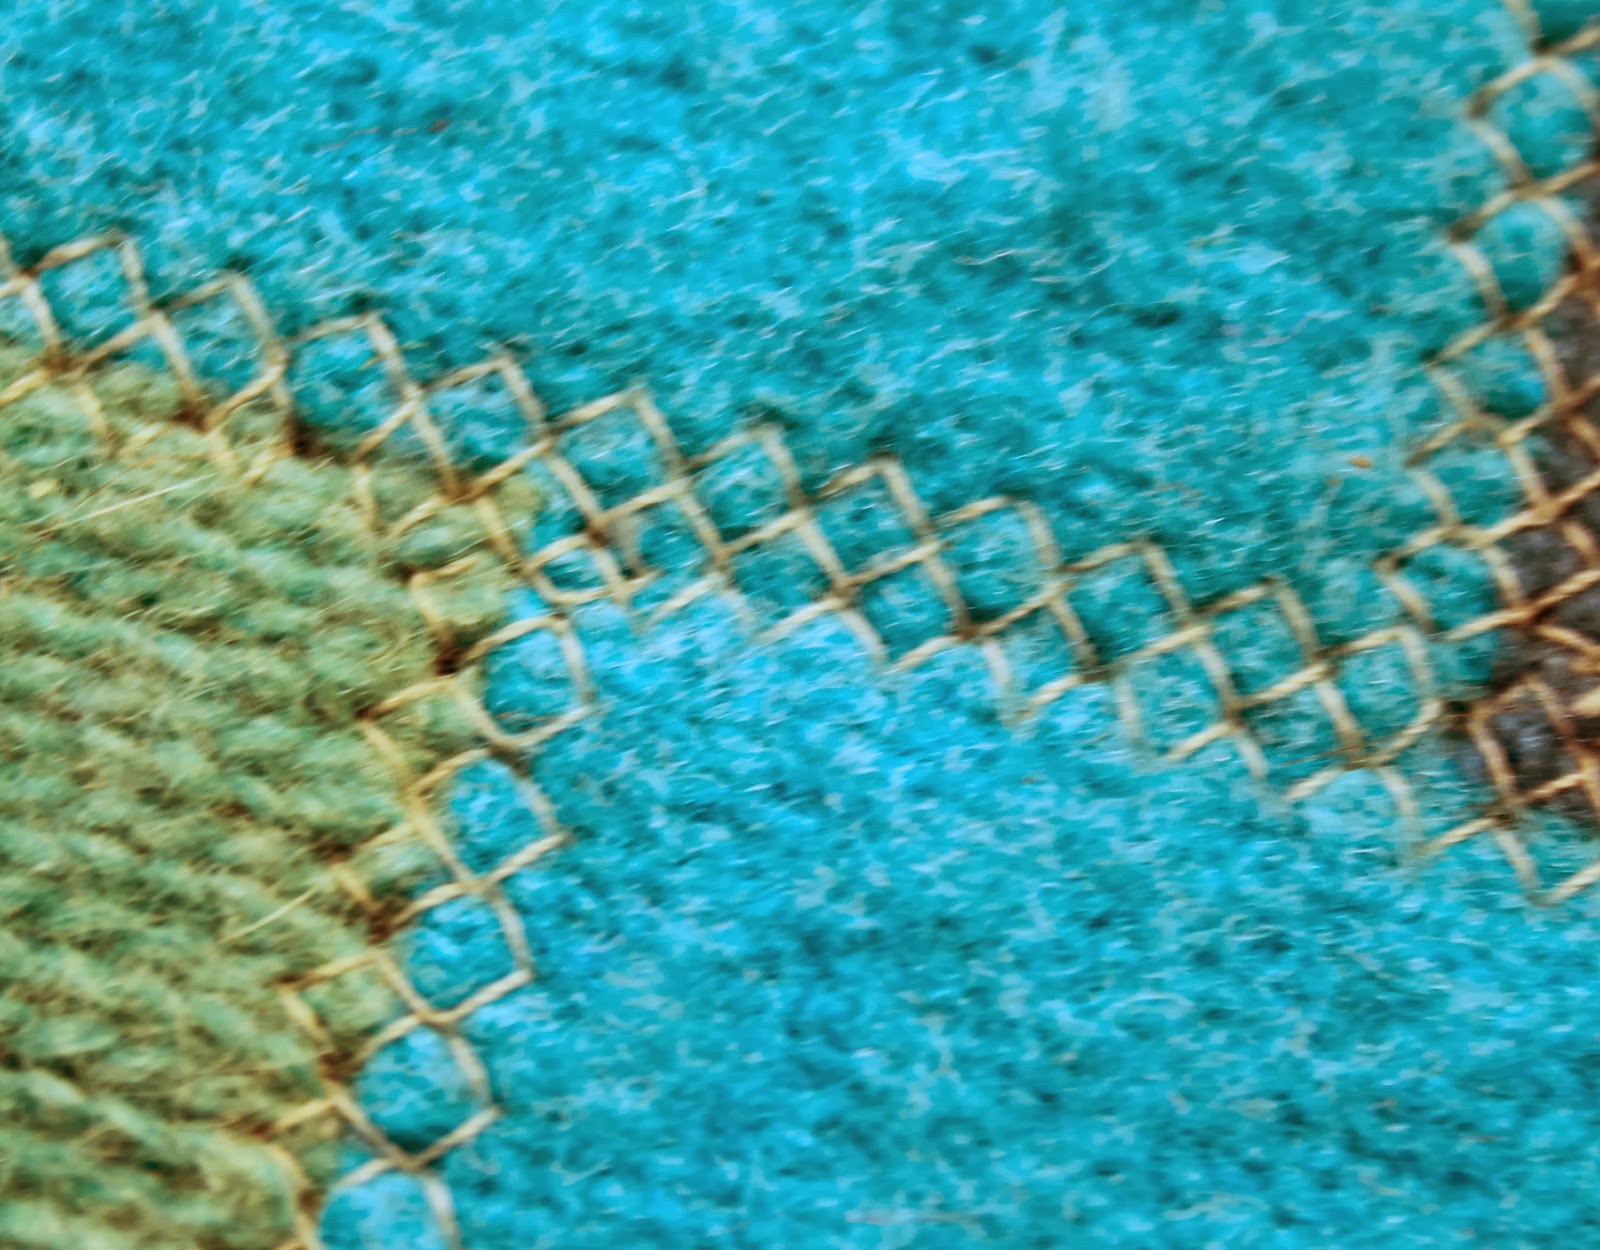
After layout, I went to the machine and starting sewing them all together. My Poppet used a wide zig zag on her case but I've got a great stitch pattern on my machine that I've found is perfect for sewing wool together. There's a closeup of it below. Kind of a honeycomb pattern that is super secure.
So here's the finished case. You can see a close-up of my stitch pattern below. I also used a magnetic snap for a closure and chose not to line the bag. In retrospect, it would have been a little more substantial and sturdy with a lining, but I like it as it is. I love the colorway. The two sides of the case have totally different personalities and I really have no preference one way or the other. I am partial to that gold, though...
My plan, as is always my plan, was to use up some wool scraps. I had a new ipad and my charming puppy had pulled it off my desk, cracking the screen. So then I had a new ipad with a cracked screen. Got the screen replaced thanks to AppleCare and now I needed a case.

I liked the way My Poppet alternated her rows of wool. They look like brickwork and I think it serves the purpose of offsetting the seams, making for a stronger fabric. When I used to do my purses with 3X3" squares of wool, the corners of the wool all came together and I have had issues with seams coming apart right at that corner join. Here's a couple of my purses. I had a great run with these, making them for probably 5 years. But, I tired of the sheer volume of sweaters required to give a good mix to the bags. Most of my bags had squares cut from about 15 different sweaters. That's a lot of bulk and storage. So, after that phase, I began making the fingerless gloves that I've posted about in the past. We won't go into those again. This time (January of last year) I wanted to use all solid pieces of wool and was the most inspired by the Garnet Hill cover where the colors segue from blue into gold. So, I got out all my scraps and went to work. I knew I wanted a rectangle so the brickwork seaming would be straightforward. I grabbed a bunch of wool scraps and also delved into heavier weight cashmere just to fill in the color gaps. Naturally, I had more than I needed.
Here they all all laid out. I really love that deep golden color at the very lower right. I think it grounds the piece, especially as you head into the pale blue.
After layout, I went to the machine and starting sewing them all together. My Poppet used a wide zig zag on her case but I've got a great stitch pattern on my machine that I've found is perfect for sewing wool together. There's a closeup of it below. Kind of a honeycomb pattern that is super secure.
So here's the finished case. You can see a close-up of my stitch pattern below. I also used a magnetic snap for a closure and chose not to line the bag. In retrospect, it would have been a little more substantial and sturdy with a lining, but I like it as it is. I love the colorway. The two sides of the case have totally different personalities and I really have no preference one way or the other. I am partial to that gold, though...
Labels:
felted wool,
patchwork,
recycled sweater,
recycled wool
Tuesday, December 21, 2010
Another stair riser finished!
If you've been with me for awhile, you'll remember my stair risers. I'm doing each riser in a slightly different technique. Here's the original post: http://ragingwool.blogspot.com/2010/03/life-in-old-house.html So far, I have wool applique, lace knitting, crochet, rug hooking, penny rug, and embroidery. This is my latest finished riser. It's an homage to my hometown of Redlands, California. Redlands has a lot of history including being the former orange capitol of the country. Beautiful Victorian homes line the streets and mix with Spanish and Craftsman architecture. It was a great place to grow up. We had an orange grove in our backyard and, in season, my brothers and sister and I would eat at least 4 navel oranges straight from the tree.
Obviously I wanted an orange tree as the focal point. I've used this applique technique on a couple of projects lately. You can create a surprisingly delicate tree even with bulky wool. The key is to take it slow.
Once you have your base fabric and your motif fabric, you very carefully base them together.
This allows you to sew without the stuff shifting all over. You work from the back (in this case, the blue fabric) but the accent fabric is really what you're interested in. My tree will be brown.Once you've got it basted, draw your motif on the back and then slowly sew each line. It's very important to use a locking stitch at the end of each line. After sewing, it looks like this:
This is from the blue side, obviously. Each line is stitched and locked in place.
Next you get your small, sharp scissors and very carefully, under good light, cut away the excess wool. This takes forever, especially with a large tree like this. Do not overdo the wine during this process. One wrong snip and you have a mess.
For the oranges, I ordered some felt balls from Etsy. I could have made them myself, but they are really inexpensive to buy and, frankly, I have better things to do. The leaves are made from some boiled wool. Actually they came from the sash tie of a boiled wool duster I got at a sale. I knew I'd never actually tie the coat but couldn't bear to throw away the long strip of beautiful loden green wool. That was about 5 years ago and I finally used the strip. Never throw wool away.
I added a little embroidery to the sides just to fill in the space but the tree is really the star. I only have three more risers to go. I think I've been working on these for about 5 years. I wait for inspiration to strike. Who knows when they'll be done!
Labels:
felted wool,
recycled wool,
Redlands,
wool applique
Subscribe to:
Posts (Atom)