Showing posts with label recycled wool. Show all posts

Sunday, April 24, 2016

The 100 Day Project -- Little Wool Houses

 In 2015, several of my Hudson friends participated in this fantastic creative challenge.  I was impressed and followed all of them on Instagram.  And, I swore I would participate in 2016.  So, here we are.

The timing could not be worse.  It's baseball season so my boys have 3-5 games a week each.  I'm co-chair of After Prom for our school and the date of that event is May 14.  20 short days away.  This project will run all the way through until the end of our summer travel ball season so, by the time it's over, I will have made 100 little houses and watched over 100 baseball games!  How fitting.

Here are my submissions for Days 1-5.  Follow me on Instagram at @pegmayor to see it all.
I put the pattern together in the winter.  I definitely wanted a rectangle because one of the things I plan to do with some of the houses is to make a floor rug.  I want to lay out the rectangles like bricks.  My inspiration for the rug comes from Yoko Saito's great book, Woolwork.  Here's a shot of her rug.  I'm considering a similar style for maybe 50 of the little houses.  I'll have to mat and back each rectangle, of course.  Plus I'll have to bind the edges somehow and the rug will probably need a low-traffic spot.  But, how fantastic is that rug?!  I love the spaces in between the bricks.  It allows you to really see the different textures of the wool.


Beyond that, I'm considering a wall hanging for next to my desk where I have a long skinny space.  I sized the rectangles based on that space, actually.

I'm also finding that I can use even the smallest bits of wool from my stash.  Some of these wools are among my very favorites and it's great to have so little waste.

So, follow along as I attempt to keep up with the pace.  I'm stitching at baseball games these days.  Why haven't I ever considered combining my love of baseball with my love of wool before?!  Brilliant.


Monday, January 5, 2015

January projects

I grew up in Southern California and there really wasn't any time of year when you couldn't be outside.  Living here in northeastern Ohio, there are days in January and February (and last November!) when it is simply too cold to do much outside except bundle up and walk the dogs as quickly as you can.  Lucky for me I have lots of indoor hobbies.  Here are a few of the projects I currently have going.

First up is an homage to Sophie Digard.  Her scarves and bags and work in general are a major inspiration for me.  I simply can't imagine doing crochet on such a tiny scale.  This past fall, after the Ladies Night at my boys' school (where I sold a TON of gloves and scarves) I splurged on this scarf.  This is classic Sophie Digard.  Tiny, tiny granny squares embellished with bits of velvet.  Stunning, isn't it?  I love it and it matches about 85% of my wardrobe, no joke.

So, in my lame attempt to flatter by imitation, I am crocheting a scarf.  Y'all know I'm a knitter.  Any crochet expert would cringe at my work on this but I'm persevering.  The yarn is Purl Soho line weight merino wool in a beautiful grey/blue.  Very thin.  If I was on knitting needles, I'd be on a size 4 probably.  The plan is to complete the scarf and then appliqué circles of velvet on top at each end.  I bought some velvet swatches on line which should get me plenty of circles for the appliqué.
 The work is pretty slow going because I'm just not as comfortable with crochet so I stop every row to count and make sure I've still got the right number of squares in the pattern.  I've had to rip a bit out when I got off pattern.  (sigh)

The velvets are pumpkin, eggplant, green, and ivory.  I think it will be great once complete.


 The next couple of projects are my attempt to use the techniques championed by Sue Spargo.  I came across her work by chance when searching for inspiration for my fabulous beret hat detailed here.  Sue Spargo did the leaves that are pictured in that post.  Amazing work.  This book is going to be my muse this year.  I've even signed up to take Sue's online class on Craftsy.com.  Check it out.

You may remember I've been working on stair risers for a long time.  Years.  I complete a new riser whenever I have a good idea which is, apparently, not often!  The previous efforts are detailed here.  I love my stairs and visitors to my house are always very impressed.


So, I finally came up with ideas for two of the remaining risers.  The first is inspired by Fraktur designs and I used a tulip pattern directly from Susan Feller's Design in a Box.  (Available here)  I bought this great product at a rug hooking retreat.  It has Fraktur patterns on card stock so I was able to scan the tulip and then print it out multiple times to make all my patterns.  The entire riser is about 36" wide and there is a tulip at each end with long curving stems crossing in the middle.  A heart seemed to be the perfect motif for the center.


You can see each little bit of the tulip is a different wool.  The inspiration wool was the main one on the heart and the base of the tulip.  All other wools were chosen based on their relationship with that wool.  Thus the orange and deep red and the fabulous green.  I embellished some of the portions using stitches from Sue Spargo's book.  


I'm also working on a stair riser that's dedicated to our town, Hudson, Ohio.  This is a bit of a "duh" moment since I can't believe I haven't done this one before.  As a refresher, Hudson was founded in 1799, 4 years before Ohio became a state.  We are fiercely proud of our history and our architecture.  Here's a shot of our main street:
I didn't think I had the artistic ability to pull off the row of stores from an angle like this so I am doing mine from head on.  No perspective required.  Obviously, a work in progress but here is some of the completed work.
 Each store front is a little different.  I am trying to duplicate color scheme as closely as possible.  This section of Main Street is almost entirely brick, either left red or painted.  It was once wood but there was a major fire in 1792 and this block was lost.  So they rebuilt in brick.  One block north is still all wood.  Part of the charm of this fantastic place.  My little post-it notes detail the trim and window colors so when I'm working in front of the TV I don't have to pull up a picture on my phone and try to determine which floss I should be using.

The beautiful clock tower will be added last.  It will sit in front of the two buildings on the far right.  The clock tower is brick and those 2 buildings are brick so I used 3 different red wools to delineate between the buildings.

Once these two risers are complete, I only have 1 more to do.  And, the final riser is very near the bottom so I probably won't do much detail since no one is going to want to squat down to look.  Something colorful and coordinating.  That shouldn't take too long to come up with an idea, should it?

So this is what's on the docket for January.  Oh, I almost forgot!  Of course, I have a knitting project on the needles.  I've been using Brooklyn Tweed wool almost exclusively for about 18 months and I'm knitting a pullover using a beautiful pale grey plus colorwork with all my leftover wools and a couple of additions.  I'll take some shots of that soon.  I finished about 1/2 of it over holiday break but I've put it aside while I'll working on the stair risers.  It'll keep.

What are you working on this winter?


Monday, November 17, 2014

Ornaments -- I can't stop myself!

I'm having an Ornament-making Party in a few weeks.  I don't know why I've never thought of this before given that I make ornaments every year for teacher gifts, present toppers, and for my own enjoyment.  I'll post about all the party projects eventually but here are a few ornaments that I've made in anticipation of the Ladies Night Out shopping event that I'm participating in later this week.


These are tiny trees made from scraps of cashmere.  The base is a vintage thimble.  To make them, I first secured a wire in the bottom of the thimble.  Then, I filled in the thimble with some beads to act as a kind of tree skirt.  Once all that was dry, making these was a snap.  I cut some of my varied green cashmere scraps into 6 different sizes of squares.  I used a muffin tin to keep them all separated and then sat there stacking up the squares and threading them onto the wire.  A loop at the top and a little circle of gold wool to act as a star -- super cute and super easy once the gluing is done.  I also made some of these in shades of ivory but I'm using a white tree so the green looks better.  I'm actually using these as the party favor for my ornament party but I had a few extra so I'm putting them in my sale.  I know they're going to sell.  So cute.  Vintage thimbles can be found for about $1 each on Ebay.  I love the little brass-colored ones.

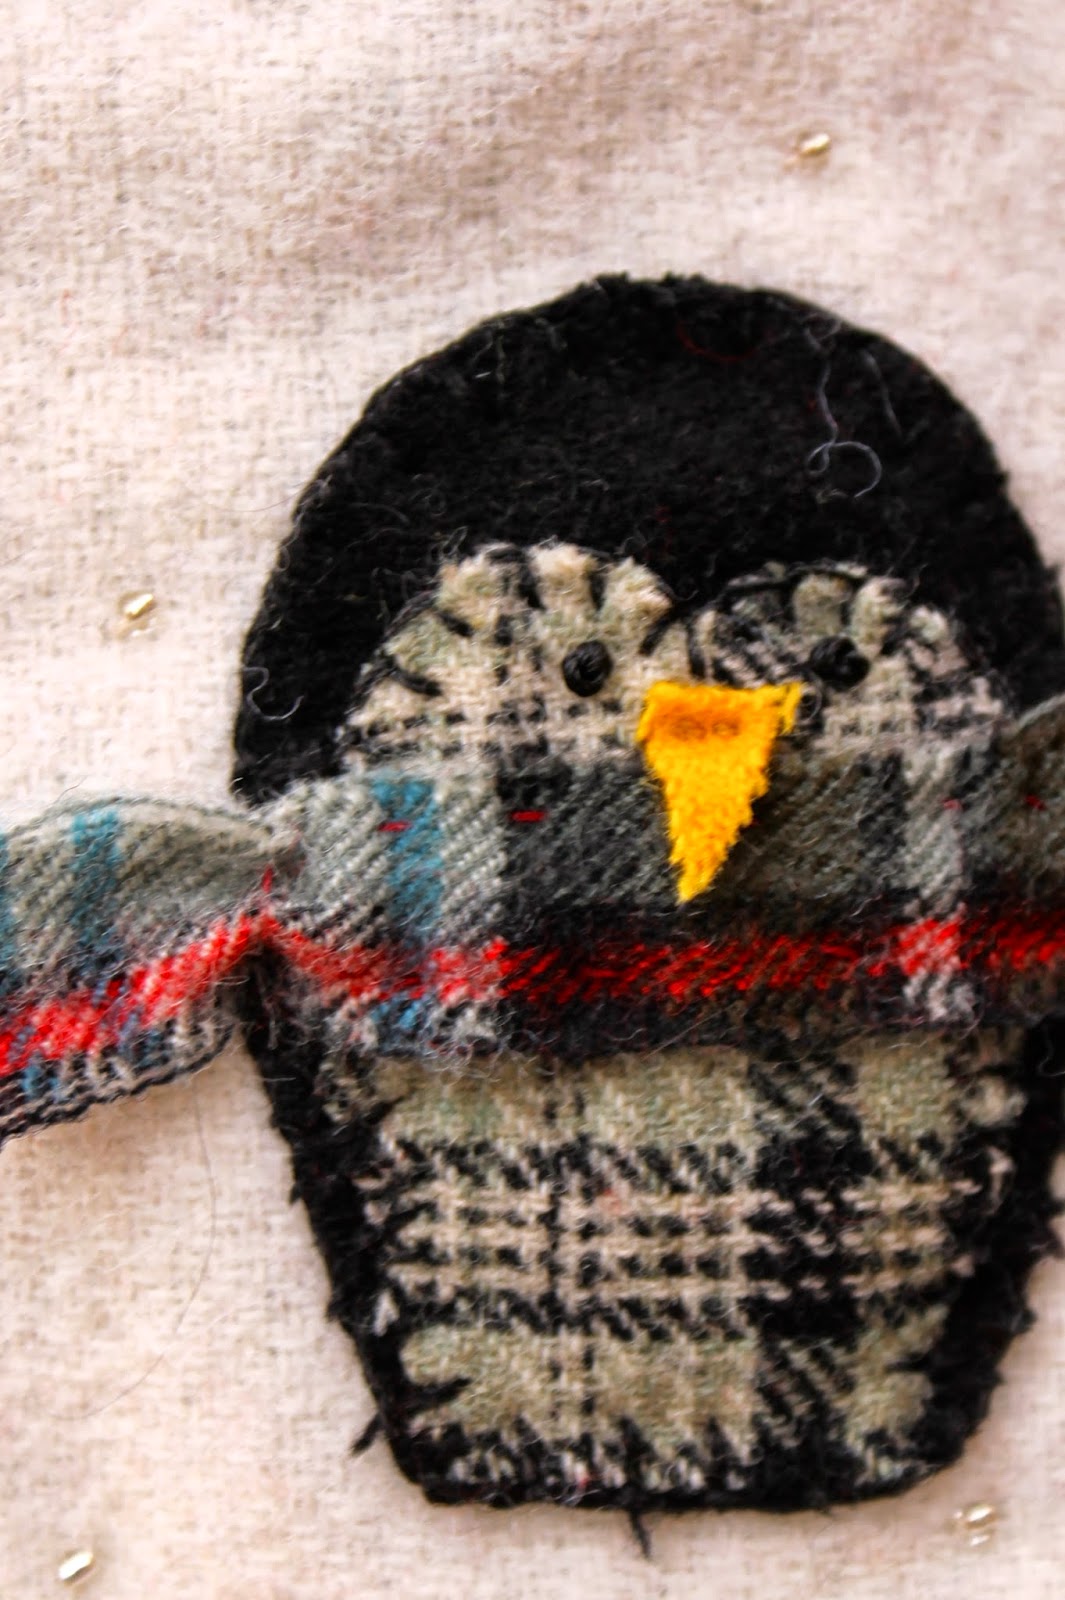
Next up is owls.  I have a giant stash of plaid wool from thrifted skirts.  As you remember from my penguin stocking, I like to mix and match and these little owls are so cute!  I modified a design I had seen on Pinterest and made myself a pattern.  It's all hand-sewn and stuffed with a little bit of my cashmere and wool scraps.  I can't bear to throw even a little bit of cashmere away...  I really love the black and white owl with the contrast red stitching.  The earth-toned owls look just like some of the color variations you find in nature, don't they?  These owls are one of the projects for the ornament party.

 Some of the women coming to my party don't sew.  Not even a button.  So, this will be a little bit of a stretch for them.  It's all done in one long thread.  First you sew on the belly, then continue up and around the outside.  When you reach the point, you add some extra stitches to act as a beak before continuing down the other side.  Just before finishing, you stuff a bit inside.  You don't use much stuffing because the final step is to fold down the point and secure it with 2 buttons.  I think the stitching on the buttons really makes it look like eyes.  I used twine as a hanging cord on these so they had a more rustic feel.  Super cute.

Finally, today, I'll showcase the cupcakes.  I had hoped to use this as a project for the party but there's just too many steps and too much glue.  Using Pinterest as a resource, I saw lots of options for these.  I ended up using a cut-up toilet paper tube as my interior structure.  I would have never thought of that.  Naturally, the ribbing from some cashmere sweaters makes the perfect "wrapper."  I glued a cashmere circle on the bottom of the tube and then hand stitched the ribbing onto the tube and around the circle.  After the glue dried, I cut out 5" circles of cashmere, ran a running stitch around the outside, and pulled to make a kind of yo-yo.  I stuffed that and the tube with cashmere/wool scraps and then glued the muffin top to the bottom.  Again, I let the glue dry.

After drying, I threaded a long doll-making needle with my cord and ran the cord all the way up from the bottom, through the top, and back down.  Knot and loop at the top and a knot at the bottom.  This also served to secure the entire structure top to bottom.  On some, I ran some trim around the join between top and bottom because I didn't love the way it looked.  After all of this, I got out my beads and sequins and embellished the top of the muffin.  Way more involved than I had hoped this project would be.  I scrapped the idea of using it for the party because we just can't be bothered with waiting for glue.

Next post I'll tell you all about my little Christmas sweaters.  I came up with a great way of making little tiny hangers for them!


Friday, November 7, 2014

It's all about the Penguins this year!

It all started with the little guy on the left.  I bought him last Christmas in a great artsy shop here in my town.  There's definitely some wool content in the black part and it's almost 1/2 an inch thick.  I just love how the nose sticks out over the scarf.  The eyes are embroidered but everything else is glued.

So, I made the one on the right.  You all remember my obsession with black and white woven fabrics, right?  Well, I have an entire bin of them and I thought these penguins would be adorable with a woven patterned belly. 

I decided the penguin was a little fubsy, though.  In this new version, I slimmed him down and removed the little hand bits (for easier sewing and cutting).  Now I had a pattern I liked and I went to town.  I've made about 15 of these to use for holiday gifts.  I don't plan to sell them so I had no moral dilemma about copying the original design.  Plus, mine have some distinct differences.  100% wool.  I bought some 5mm wool felt (which is fantastic stuff, BTW) to use as a stiffener in the middle.  The black parts on the outside come from a black wool thrifted skirt.  The black and white woven patterns are all upcycled as are the scarves.  As is the nose!!  So, no new material at all except the cord hanger and the embroidery floss used to French knot the eyes.

I think the whole colony is adorable.  I had so much fun choosing just the right plaid for the scarves.  I hope my friends and teachers love them as much as I.


Now, moving past the ornaments, I began to think about my Christmas stocking entry for The Grey Colt Stocking Contest.  I'm pretty sure I've talked about this before.  This will be the 14th year and I am a founding contributor and have made a stocking (or a pillow or a wreath) every year.  I took my little penguin and shrunk him down quite a bit.  Here is this year's stocking:
 The penguins are about 2 1/2 inches tall.  The scarves are teeny little strips of wool -- super cute!  I did some beading on the outside so the ivory wool looked like slopes.  They almost look like they're at a sledding party, don't you think?  At the top, I took some raw edge wool and fringed it to add some detail that would pick up the patterns in the penguins.  The blue background is hand-dyed by me.  It sparkles in the light thanks to the tiny beads.  I'm so happy with the final result and can't wait for the Stocking Party on December 3rd.  The workmanship of all the participants is inspiring.  All stockings are donated and then raffled off after they are displayed for a week or so.  I've won a few stockings over the years and I cherish them.  The proceeds this year are going to the Kent State School of Fashion to help fund a scholarship.  Very fitting since The Grey Colt is my favorite clothing store ever.  Happy Holidays!!


Wednesday, June 25, 2014

My favorite bag shape

This is my favorite bag shape.  I bought a bag last summer at TJ Maxx.  You know I don't buy bags very often, preferring to make my own.  But, sometimes summer bags are hard given my preference for wool.  The bag was the perfect size with a nice, wide gusset to add space inside.  Perfect length handle allowing for shoulder use or just holding in the hand.  I had to duplicate. I drafted a pattern on poster board and I was off and running.


 The outside of this winter bag is alpaca taken from a beautiful coat I bought several years ago at a sidewalk sale.  $400 coat for $75.  I was thrilled and happily wore it for a couple of years.  Then I got a puppy who promptly chewed a hole in it.  The coat was reversible.  Dark charcoal and pale, dove grey.  Gorgeous.  I couldn't just give it to the Goodwill so I cut it up and made this fabulous bag.  The embellishment took FOREVER but what else does one do on a stormy and cold weekend in Ohio?!  I machine stitched the base of the tree and then hand embroidered the veining using hand-dyed embroidery floss that I found in my stash.  The cardinal is a bit of red wool plus some embroidery.  The handle is an old belt attached to some really great, heavy duty hardware from The Buckle Guy.  Lining is from Purl Soho.  Basically the outside of the bag was free stuff from my stash but I spent my whole budget on fabulous lining and hardware.  It's the details...

So here's the bag I just finished from the same pattern.  The fabric is crewel upholstery fabric I got on Ebay an embarrassing number of years ago.  Same drill on lining and hardware -- that's where I spent the money.  The lining is Liberty and was ridiculously overpriced but this bag is for me.  Actually, I made two of them.  One for me and one for a very good friend with a July birthday.  She wears a lot of blue.  Hopefully she doesn't follow my blog or I just ruined the surprise.  Handle is, again, an upcycled belt attached to fab hardware with rivets.  Surprisingly easy and great, professional looking results.  This actual bag is my friend's bag.  Mine has silver-toned hardware because I'm planning to switch out the black belt from my winter bag.  Super smart, right?     Hopefully you find some inspiration from this.  Once you find a style and shape you like, there's nothing wrong with making a closet-full of accessories.  Words to live by.


Wednesday, January 22, 2014

Ella's cushion -- Dresden plate pattern done in wool.

This is Ella's cushion.  Ella is my 22-month-old Field Spaniel that thinks she's a lap dog.  She certainly believes she fits perfectly on this cushion and that well, frankly, she owns it.  Adults can perch their feet on a small corner but should, by no means, feel the cushion is theirs.

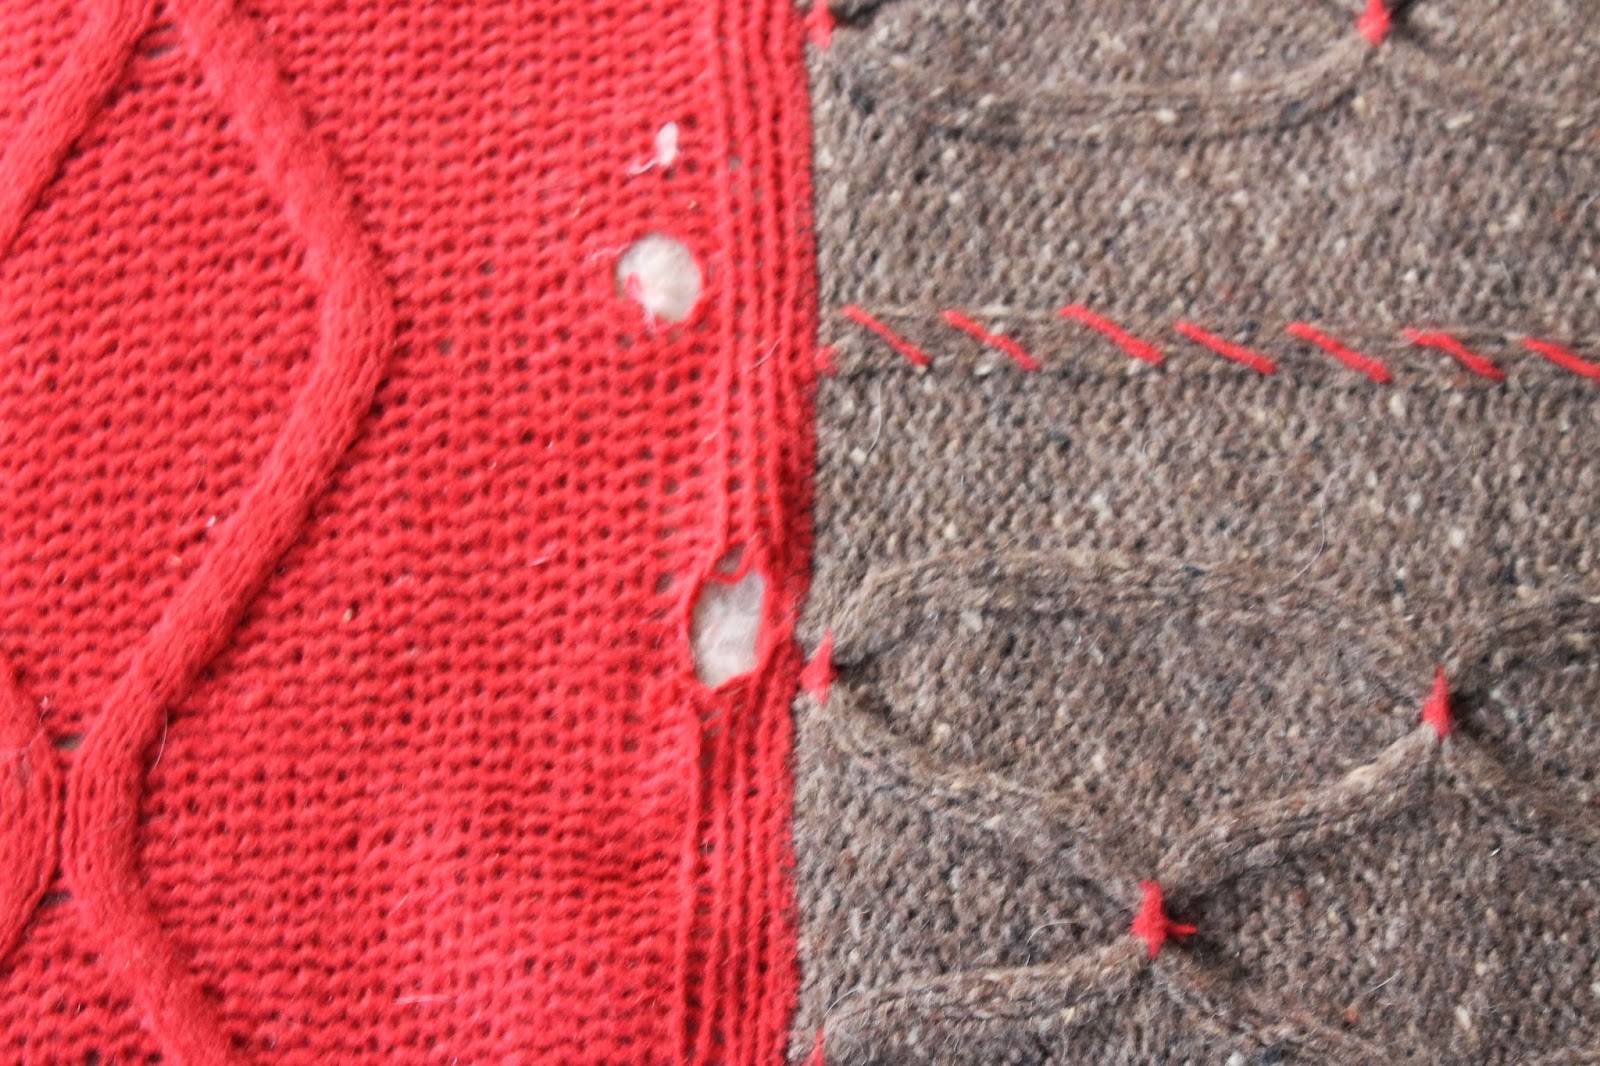
The cushion cover was made by me using various leftover wools.  The red panel is a wool and possum blend that didn't felt as tightly as I wanted and, as you can see, was weak, leading to a hole.  The center section is a sturdy wool tweed, knit in a wide rib and then smocked using the red yarn to tie the panels together.  The variegated panel was a yarn I hand-dyed myself that just happened to match the other two.  I knit and felted the three panels, sewed them together, and made a cushion for this lazy Susan ottoman we have.


Obviously, once the holes appeared, I started thinking of how to replace the cushion and what I wanted.  The original cushion was thicker and was a boring tapestry thing that came with the ottoman.  I didn't even wait for that to wear out before making the paneled cushion.

The new cushion would use a Dresden Plate quilting pattern.  I've posted about my love of American quilts before.  I never get tired of the play of pattern.  Naturally, I gravitated for the color wheel classic of red/blue/yellow.  I even found a 12-panel Dresden Plate pattern to use, planning for 4 repeats of the colors.  But, that green kept sneaking in to the pile.  The couch opposite this ottoman is dark green leather.  So, green always feels right.

 Here's the layout of the panels.  I had 2 fabrics in each color.  Every panel has texture of some kind -- plaid or stripe or whatever.  Most are hand-dyed by me or someone like me.

Now to the stitching.  Given that Ella was going to lay on this thing, it needed to be strong.  So, I machine-stitched the panels together along their long sides.  Then I blanket stitched the entire motif to the background wool.  This was tricky because it is big.  The motif measures 20 inches across.
After doing the outside, I very carefully pinned and started going over each long side with another type of blanket stitch.  This stitching was reinforcement and I did it to make sure everything stayed put with a 35-pound dog jumping up onto it.

Finally, I made a penny rug center to cover the big hole.  That was the hardest part to sew on because the rough cut hole kept shifting.  I probably should have basted everything on first but it was too late for that.  I just made do.

Below are shots of the finished cushion made using some foam from the craft store.  I love the final product, especially since the only supply I actually had to buy was the foam for the cushion!  What that tells me is that I have WAY too much wool in storage in my cedar closet.  I better come up with some more projects QUICK!!

As you can see, Ella approves.  Good dog.